

Agent Node
The Agent node is a node for creating AI agents that autonomously perform tasks using tools and sub-agents. While the LLM node returns a single response, the Agent node selects and executes tools until the task is complete, repeating multiple steps as needed.
The Agent node has two operating modes:
- Single Agent: A single agent utilizes tools to autonomously perform tasks.
- Multi-Agent (Agent Team): A parent agent (supervisor) delegates tasks to sub-agents, working collaboratively as a team.
The basic usage of a single agent (adding tools and execution) is the same as the Connector Node. This page focuses on multi-agent configurations.
Settings
Section titled “Settings”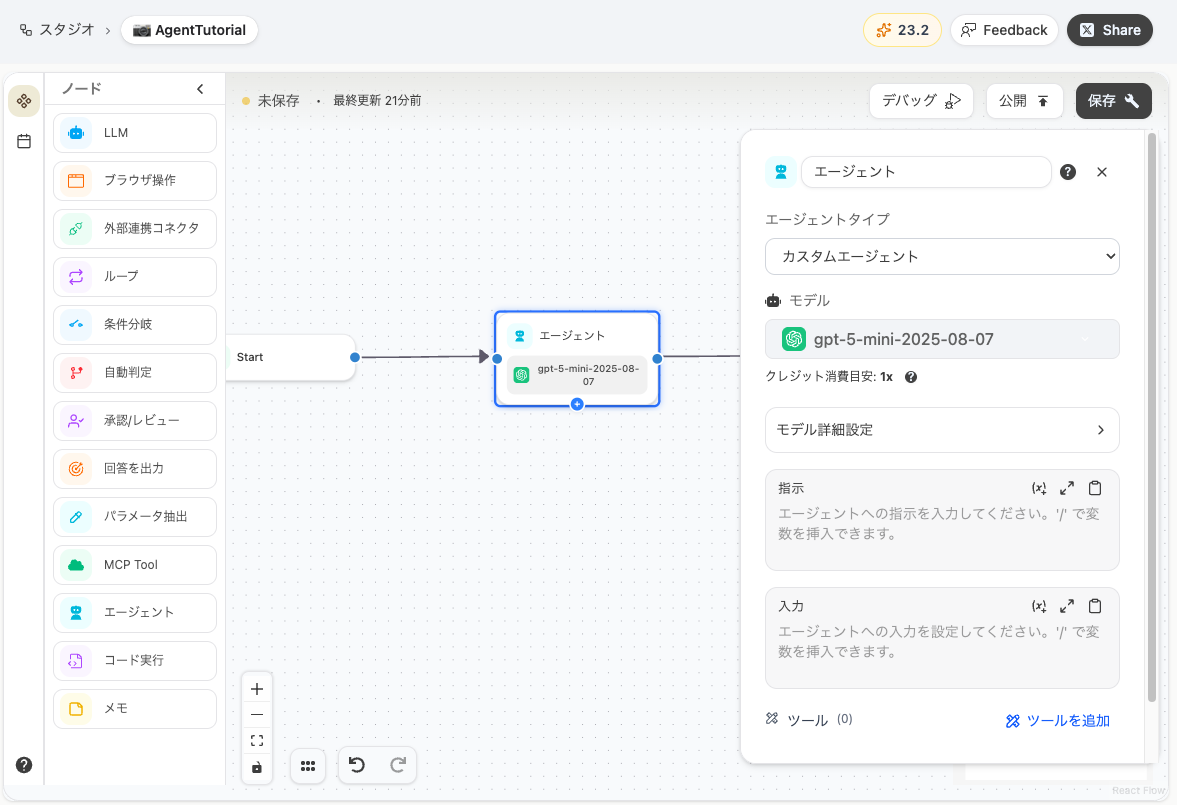
| Field | Description |
|---|---|
| Agent Type | Select Custom Agent (general-purpose agent) or Deep Research (research-specialized). |
| Model | Select the AI model the agent will use. |
| Instructions (System Prompt) | Define the role and task for the agent. You can reference variables using the {node.field} format. |
| Input | Set the message to pass to the agent. If left empty, the agent will execute according to the instructions. |
| Tools (MCP) | Add tools as MCP Servers for the agent to use. See Connector Node for details. |
Sub-Agents (Agent Team)
Section titled “Sub-Agents (Agent Team)”By adding sub-agents to an Agent node, you can build a multi-agent configuration (Agent Team).
The parent agent (supervisor) manages the overall task and delegates appropriate tasks to each sub-agent. Each sub-agent has its own tools and role, working autonomously in their respective areas of expertise.
Adding Sub-Agents
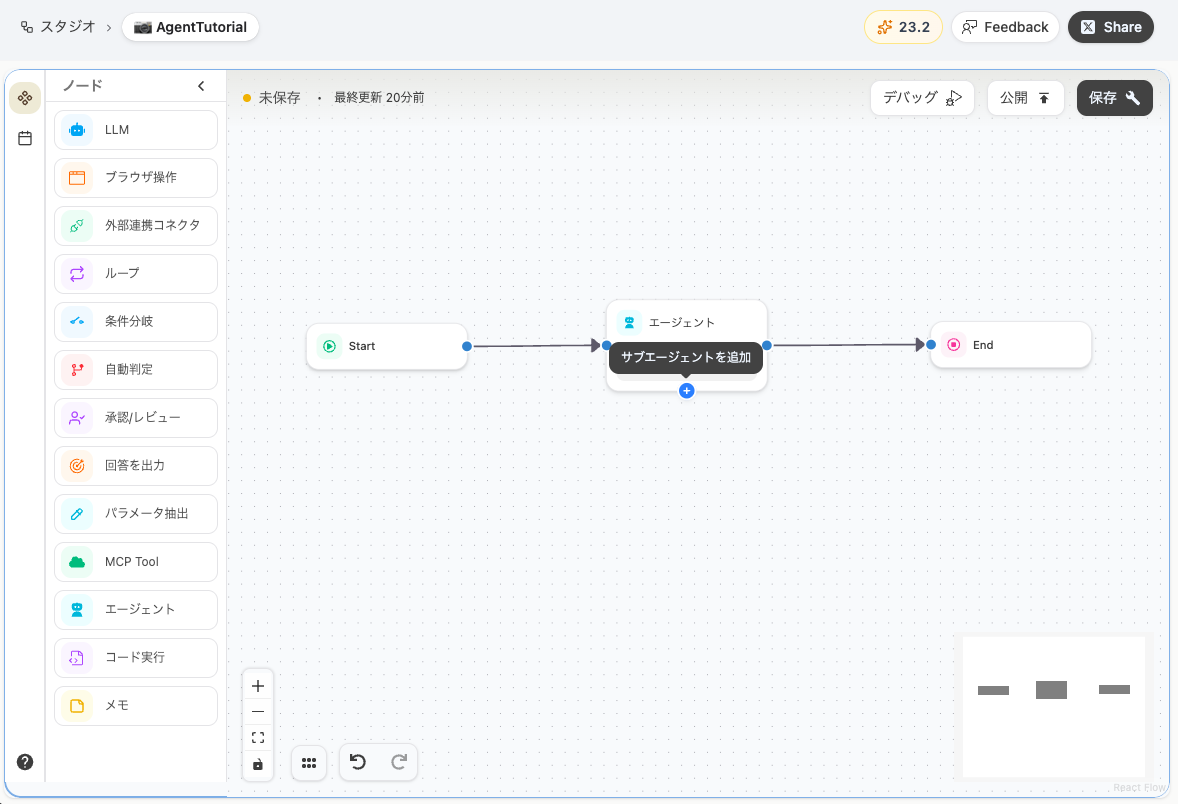
Section titled “Adding Sub-Agents”Click the ”+” button at the bottom of the Agent node to add a sub-agent.
Sub-Agent Settings
Section titled “Sub-Agent Settings”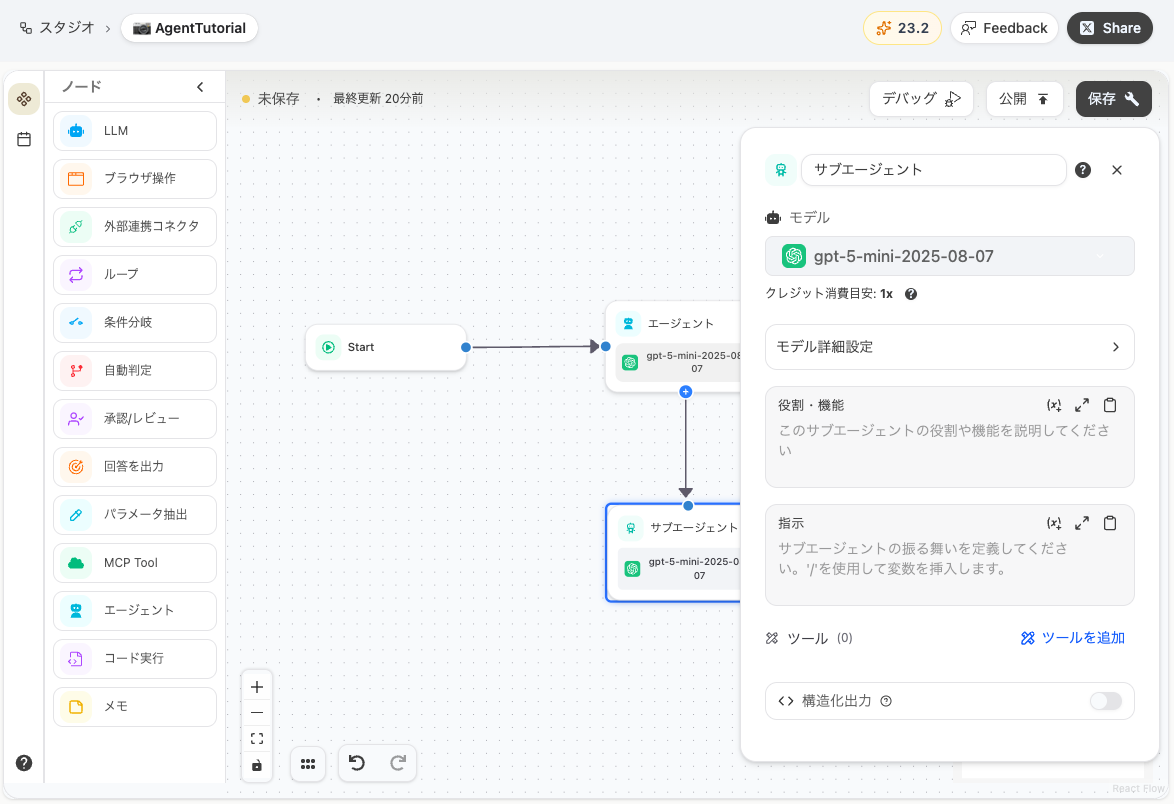
| Field | Description |
|---|---|
| Model | Select the AI model for each sub-agent individually. |
| Role / Function | Describe the sub-agent’s role. This is a critical field used by the supervisor to determine which sub-agent to delegate tasks to. |
| Instructions | Define the role and task specific to the sub-agent. |
| Tools | Configure MCP Servers dedicated to the sub-agent. Setup is the same as the Connector Node. |
Tutorial: Multi-Agent (Agent Team)
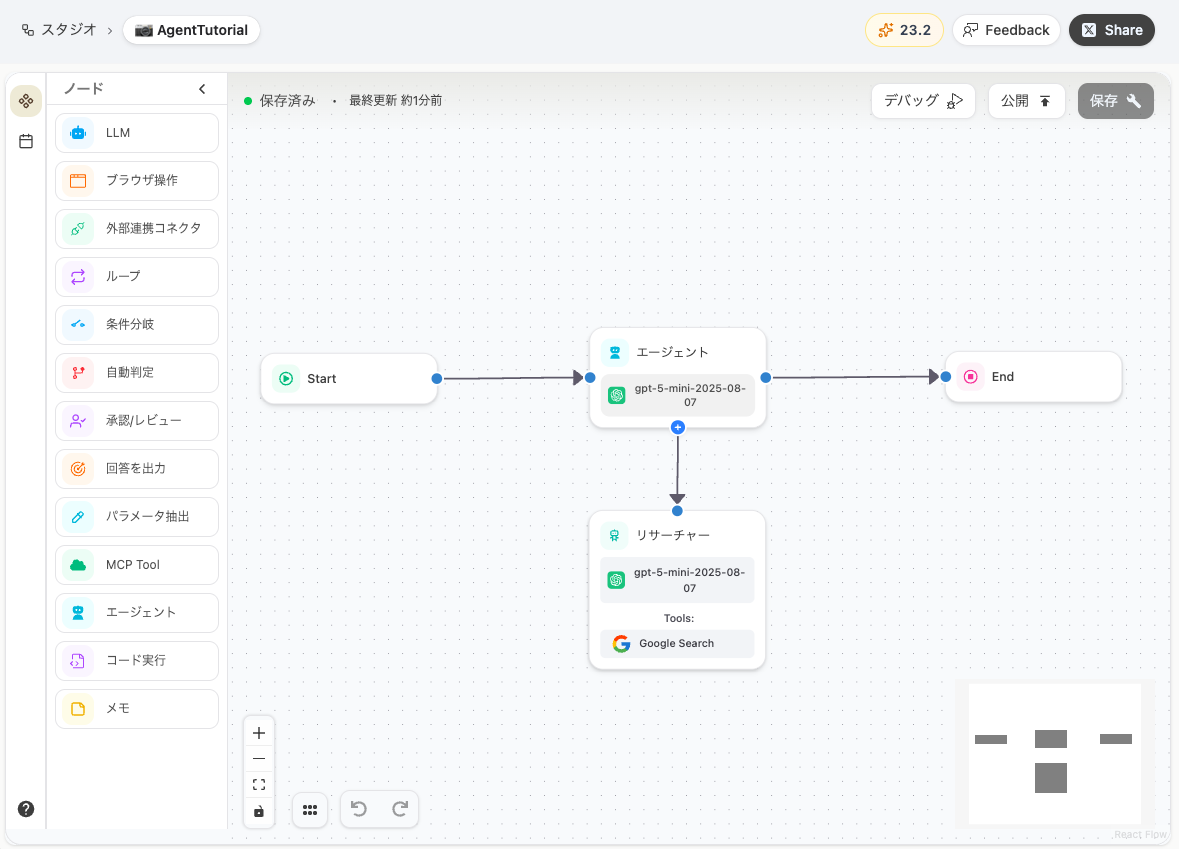
Section titled “Tutorial: Multi-Agent (Agent Team)”In this tutorial, we’ll build a multi-agent workflow that automatically creates a competitive research report.
Configuration
Section titled “Configuration”| Agent | Role |
|---|---|
| Parent Agent (Supervisor) | Oversees the entire research and delegates tasks to sub-agents |
| Sub-Agent 1 (Researcher) | Collects competitor information using web search tools |
1. Creating the Agent Node
Section titled “1. Creating the Agent Node”Create a new workflow in Studio and add an Agent node.
Set the following for the parent agent’s “Instructions” and “Input”:
Instructions
Section titled “Instructions”You are a marketing manager.For the service specified by the user, ask the Researcher to gather information, then create a simple marketing email based on the research results.Specify what kind of information you need from the Researcher.Research target: SamuraiAI
2. Adding Sub-Agents
Section titled “2. Adding Sub-Agents”Add two sub-agents using the ”+” button at the bottom of the Agent node.
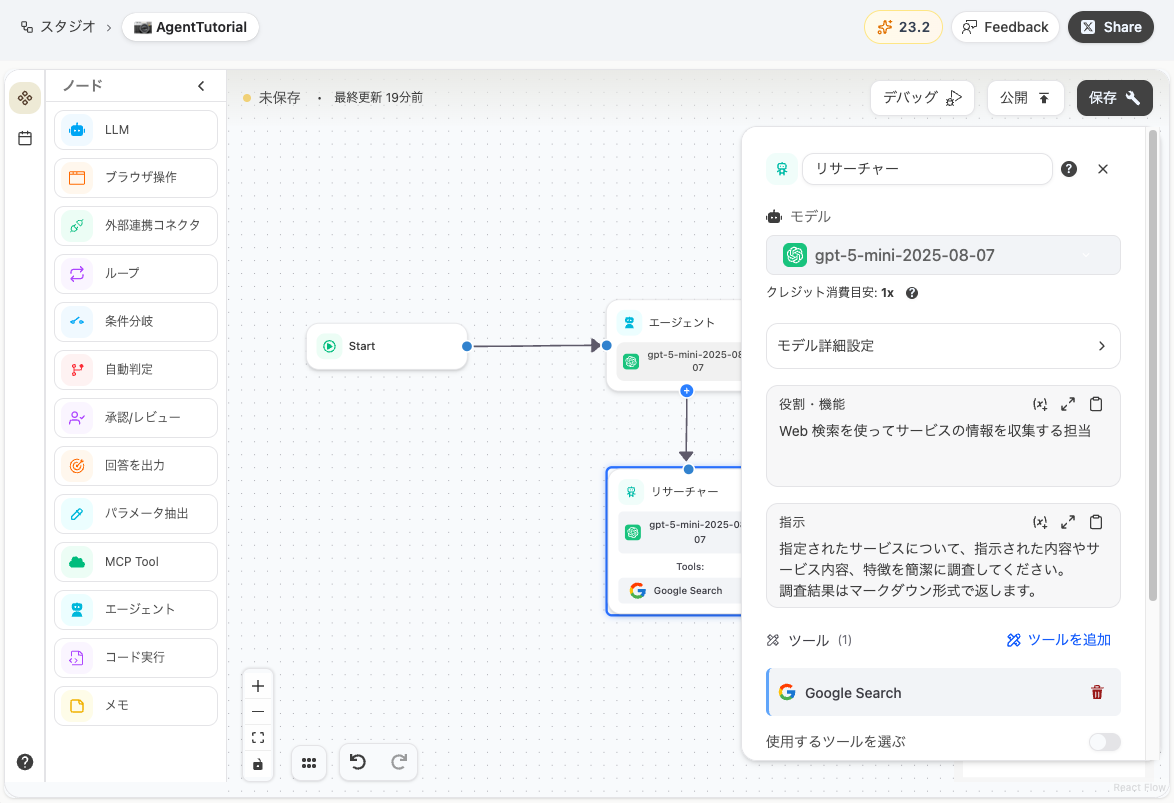
Sub-Agent 1 (Researcher):
Set the sub-agent’s node name to “Researcher” and configure the following:
Role / Function
Section titled “Role / Function”Responsible for collecting competitor information using web searchInstructions
Section titled “Instructions”Research the specified service, including its content and features as instructed. Keep the research concise.Return results in markdown format.Finally, add Google Search from “Add Tools”.
3. Running the Workflow
Section titled “3. Running the Workflow”You’re all set! Click the debug button to run the workflow.
The supervisor will ask the Researcher to gather information, and a marketing email will be generated based on the results 🚀
Referencing Other Nodes’ Outputs
Section titled “Referencing Other Nodes’ Outputs”In the Agent node’s “Instructions” and “Input”, you can reference other nodes’ outputs using the {node_id.response} format. This allows you to pass results from previous processing steps to the agent.
Using Structured Output
Section titled “Using Structured Output”To make the agent’s output easier to handle in subsequent nodes, we recommend specifying an output format (such as JSON) in the instructions.
Deep Research Agent
Section titled “Deep Research Agent”Selecting Deep Research as the agent type makes the agent operate as a research and analysis specialist. Use this for complex research tasks or when multi-faceted information gathering is required.
Note: Unlike custom agents, you cannot configure sub-agents or other custom settings.
Last updated: