

Connector Node
The Connector node is a tool for integrating with external services. This enables AI integration with other applications and services via MCP.
This tutorial introduces a “workflow that generates a recruitment blog from provided data and outputs it to Google Docs.”
Tutorial
Section titled “Tutorial”Integration Setup
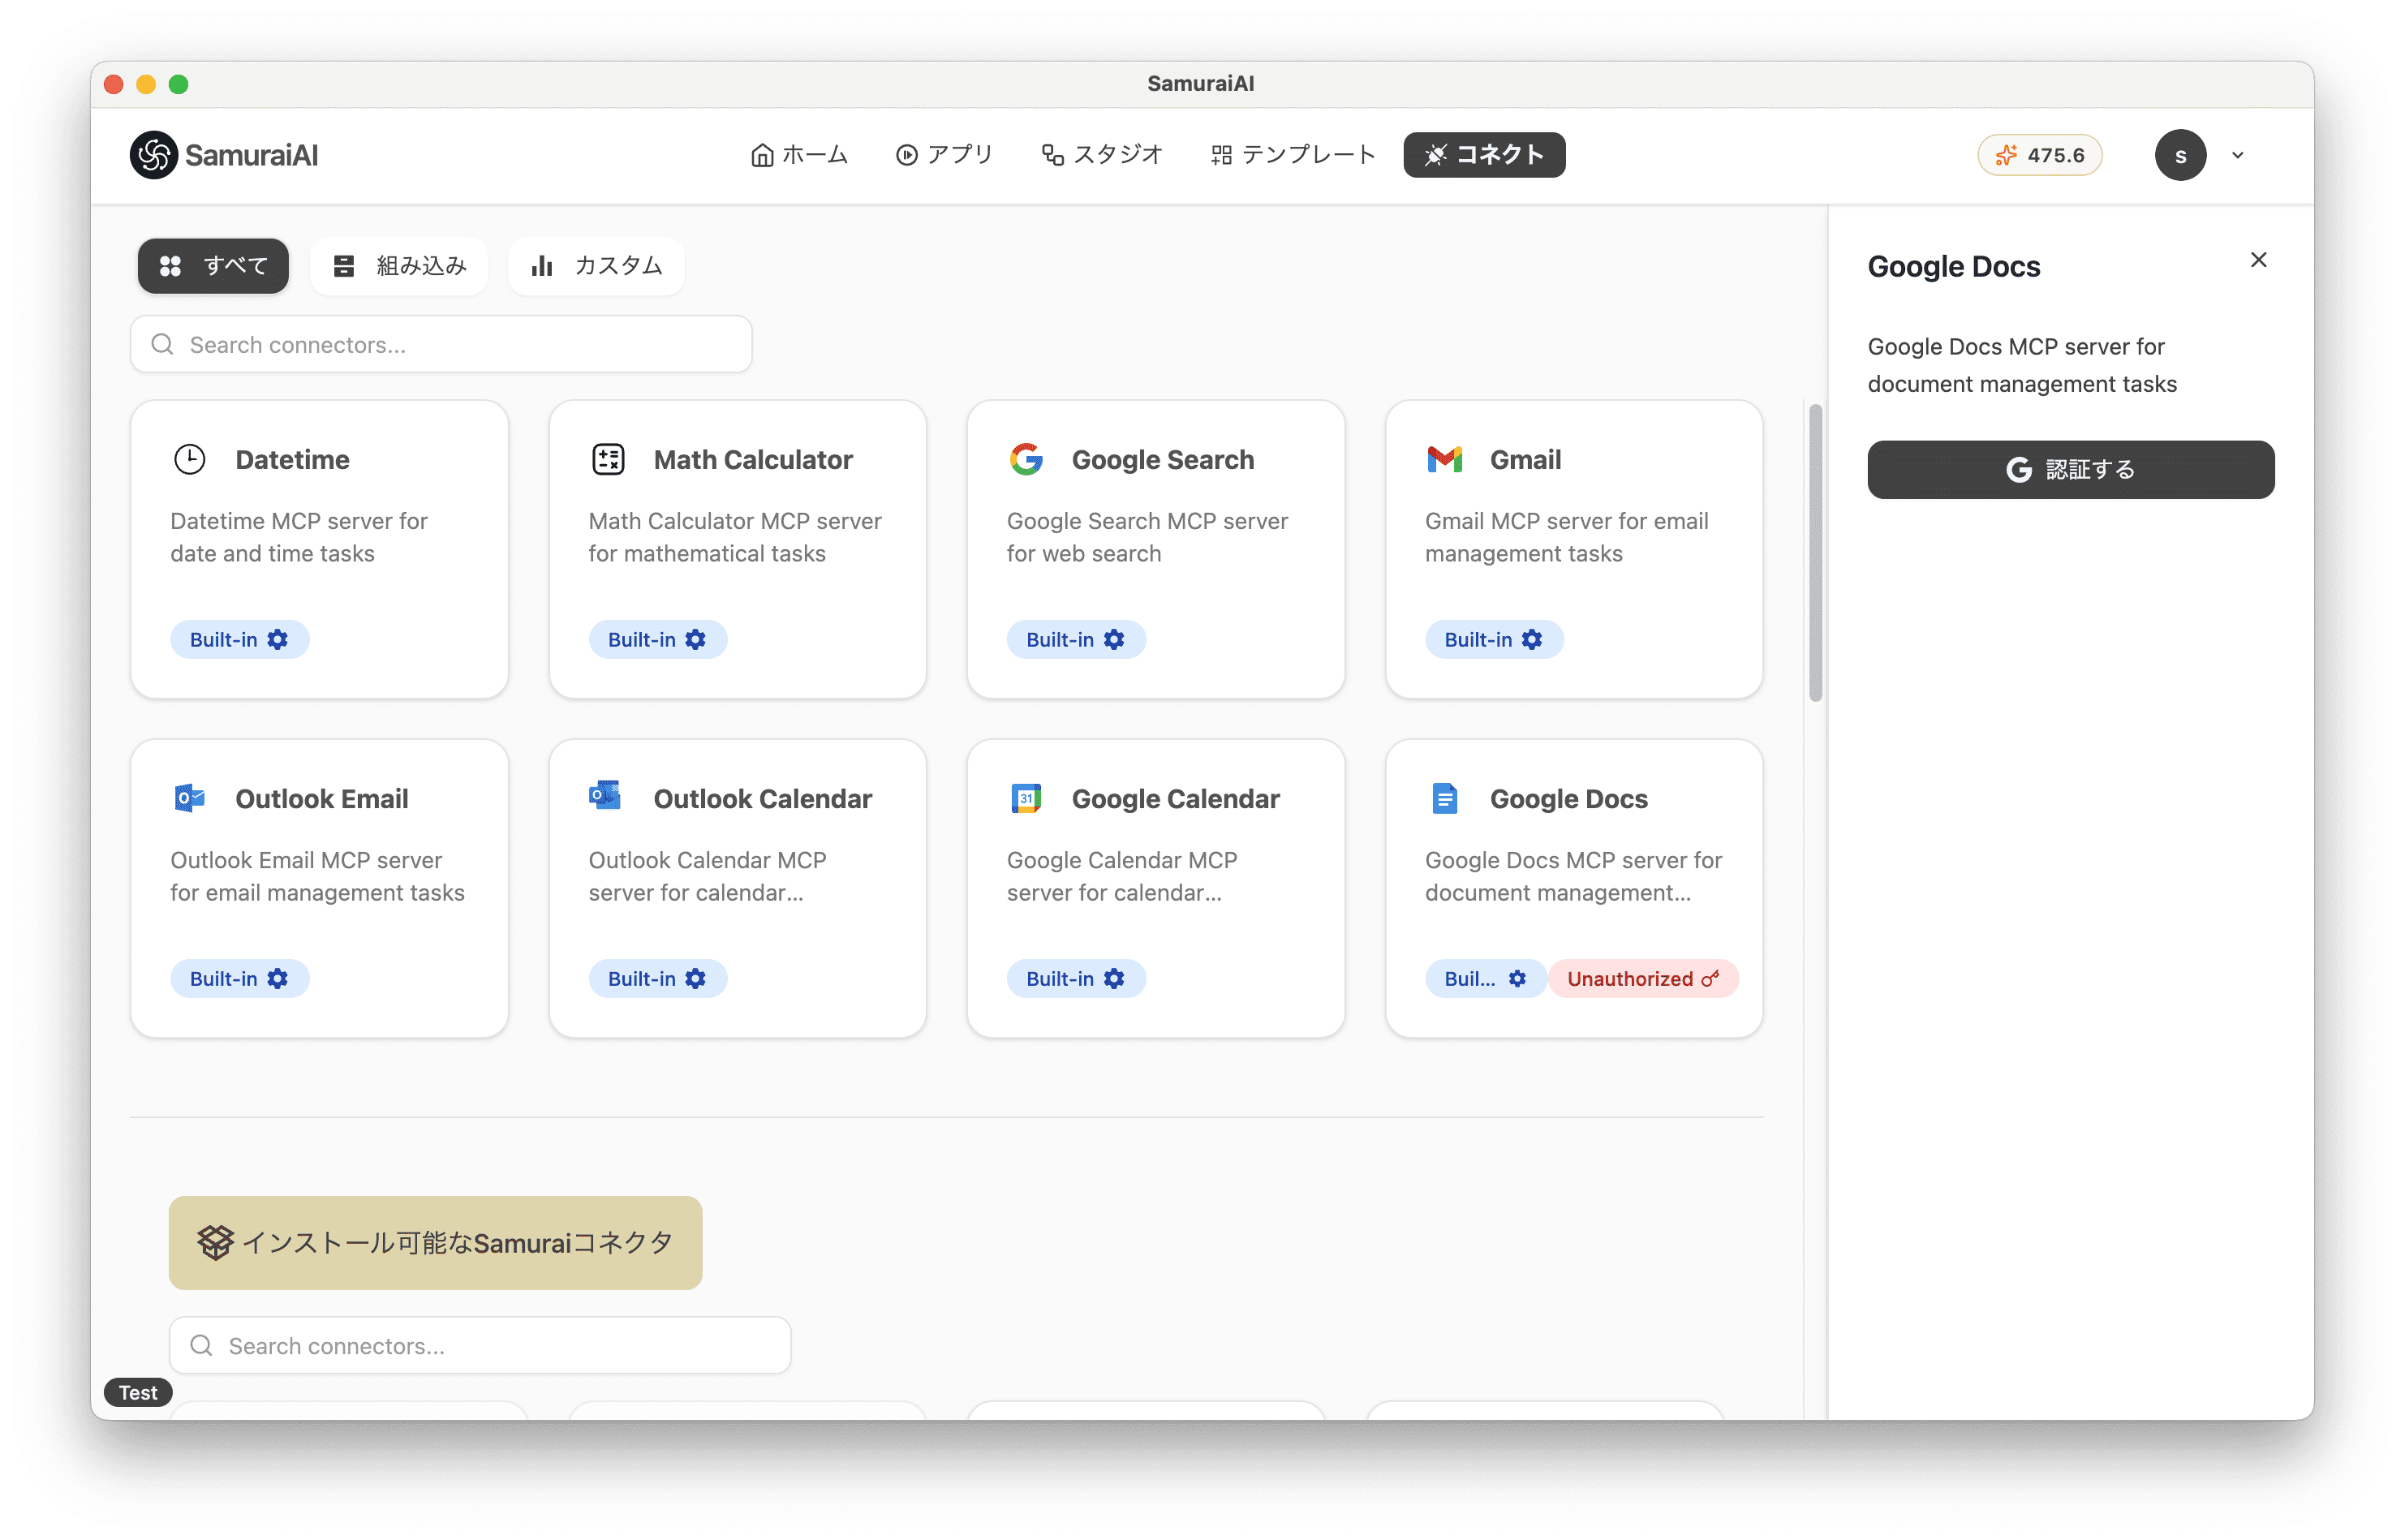
Section titled “Integration Setup”Click “Connect” at the top of the menu screen and install the connector for the external service you want to use. For this tutorial, we’ll use the Google Docs connector.
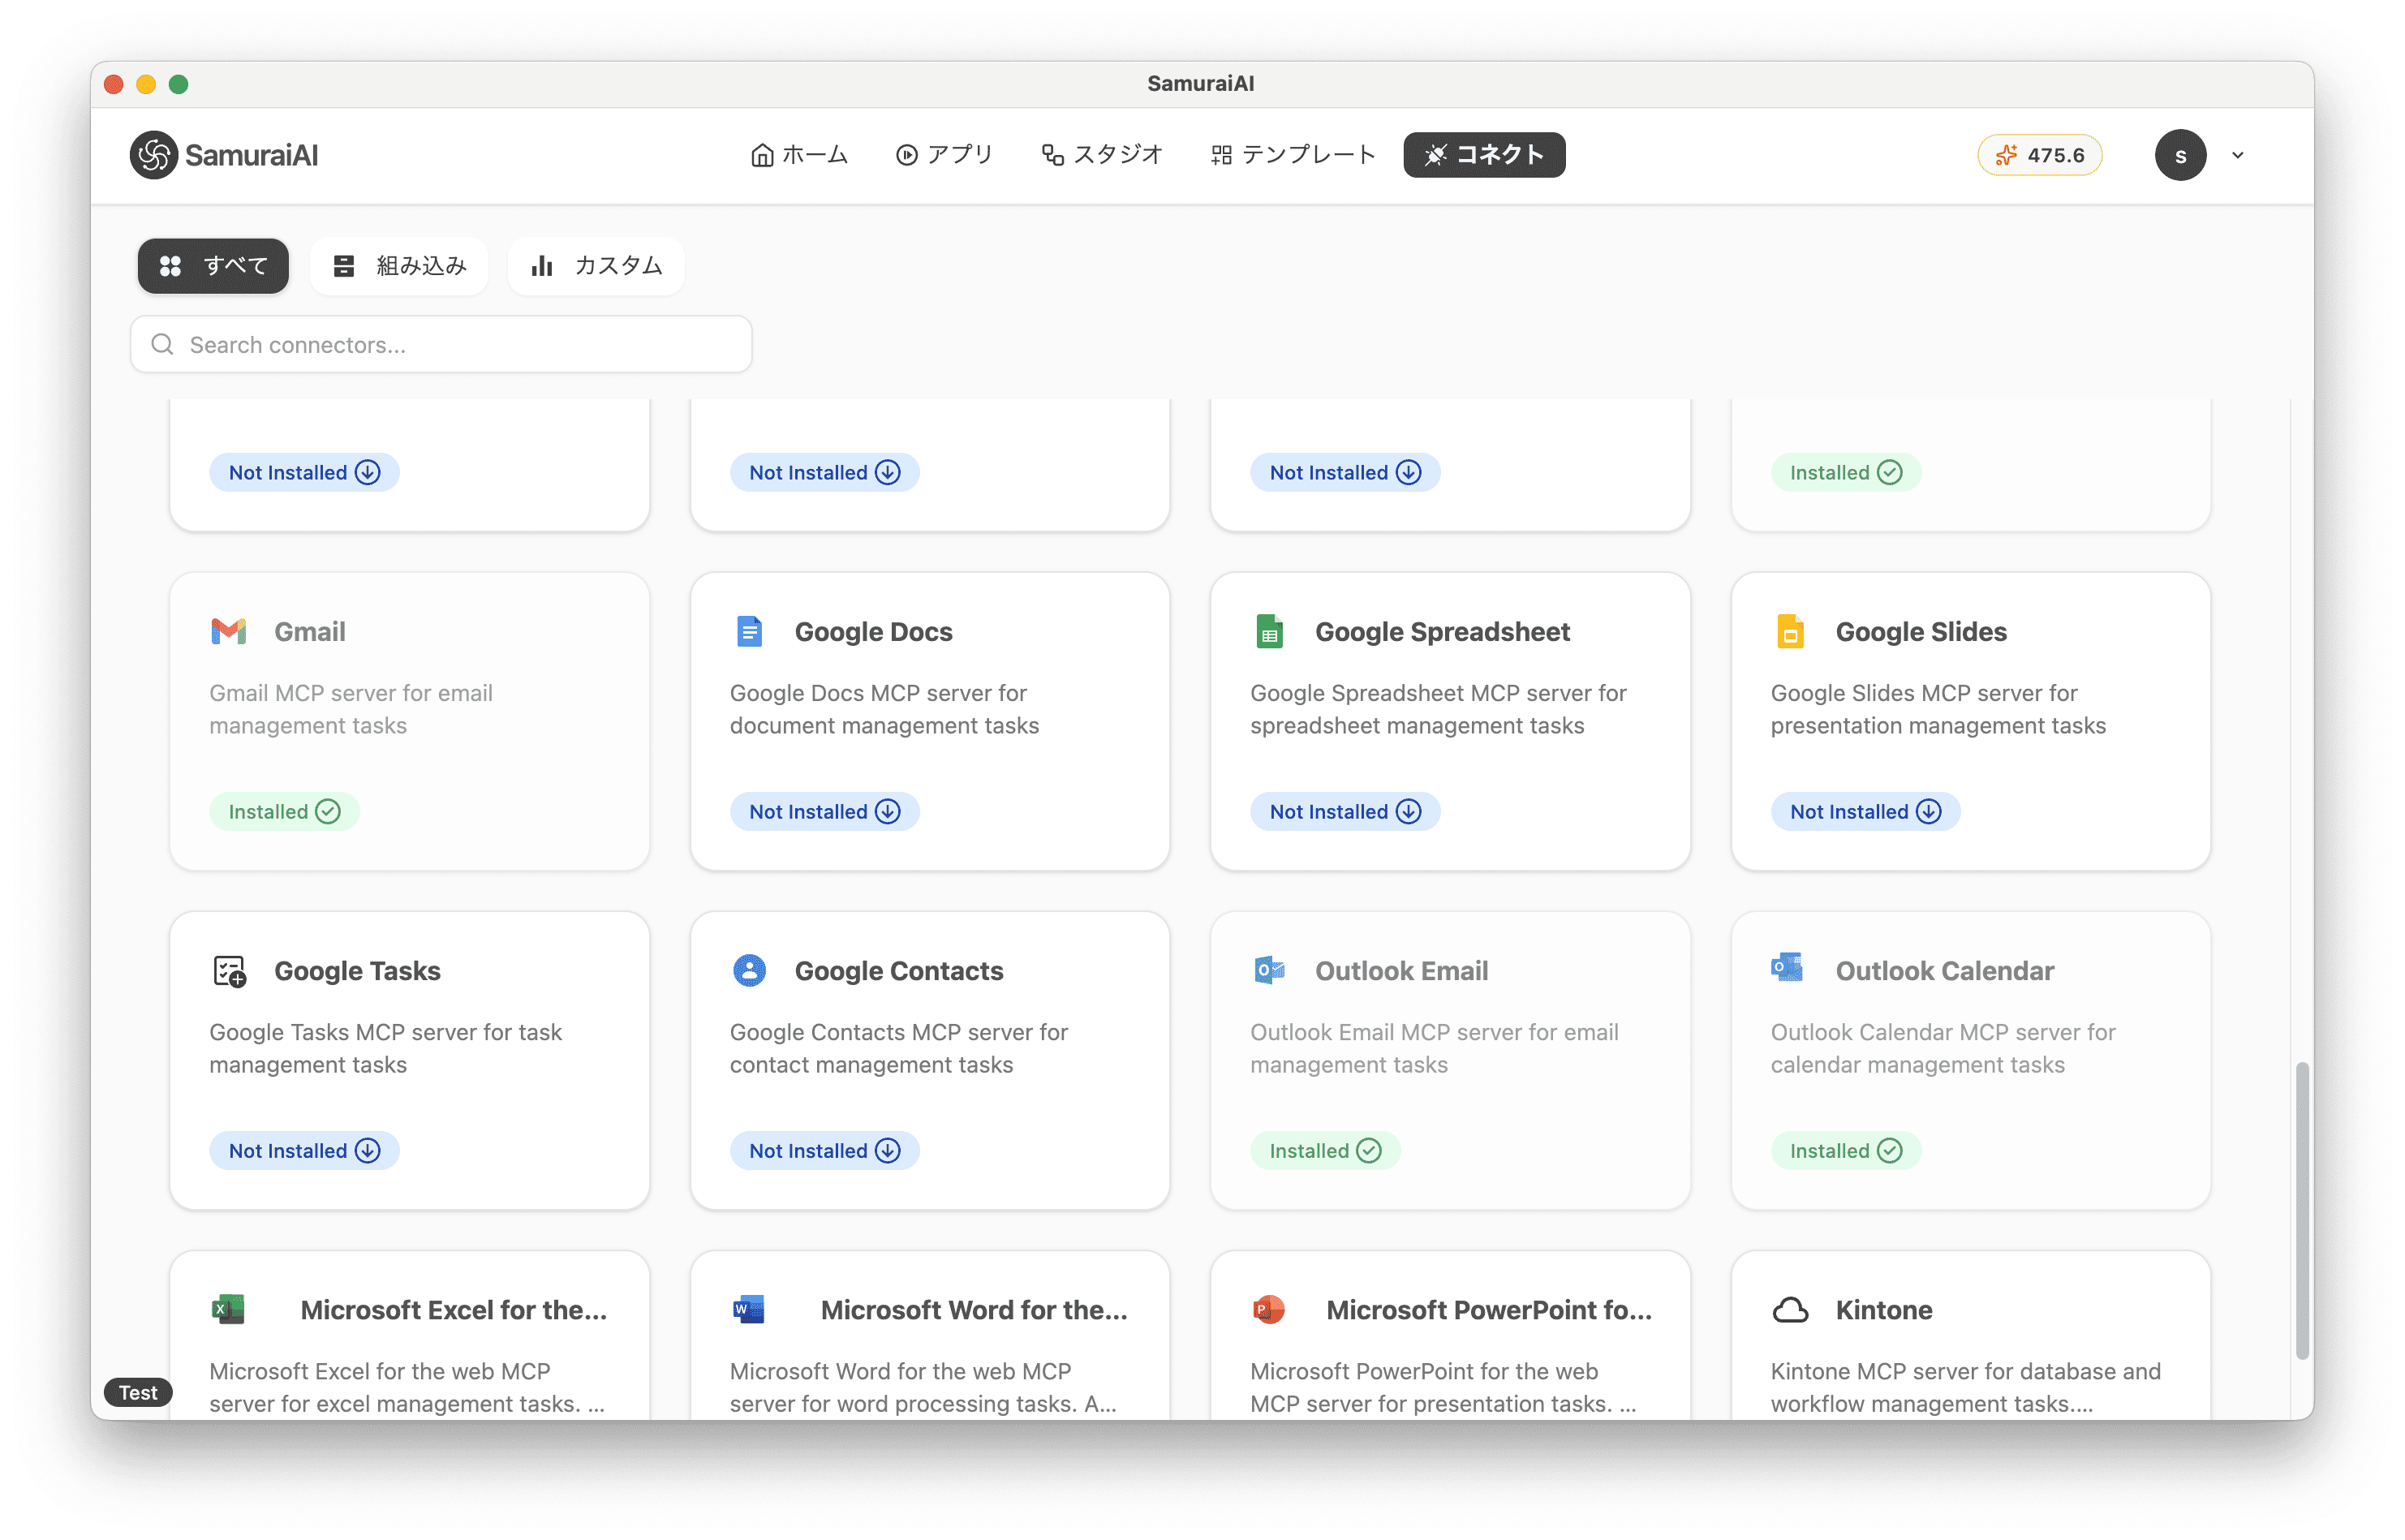
Once installation is complete, click the Google Docs connector and link it with your Google account.
Creating the App
Section titled “Creating the App”First, create a new workflow in Studio.
Add an LLM node and copy and paste the following prompt:
Write a company introduction blog for job seekers.
## FormatHello, I am Samurai Taro, recruiter at SamuraiAI Inc.Today, I would like to introduce you to ○○.
---Blog content (in markdown format. Insert emojis appropriately and describe in an easy-to-understand manner)---
SamuraiAI Inc. conducts year-round recruitment.If you are interested, please visit our recruitment page.https://kiva.co.jp/recruit
## Detailed Data{start.query}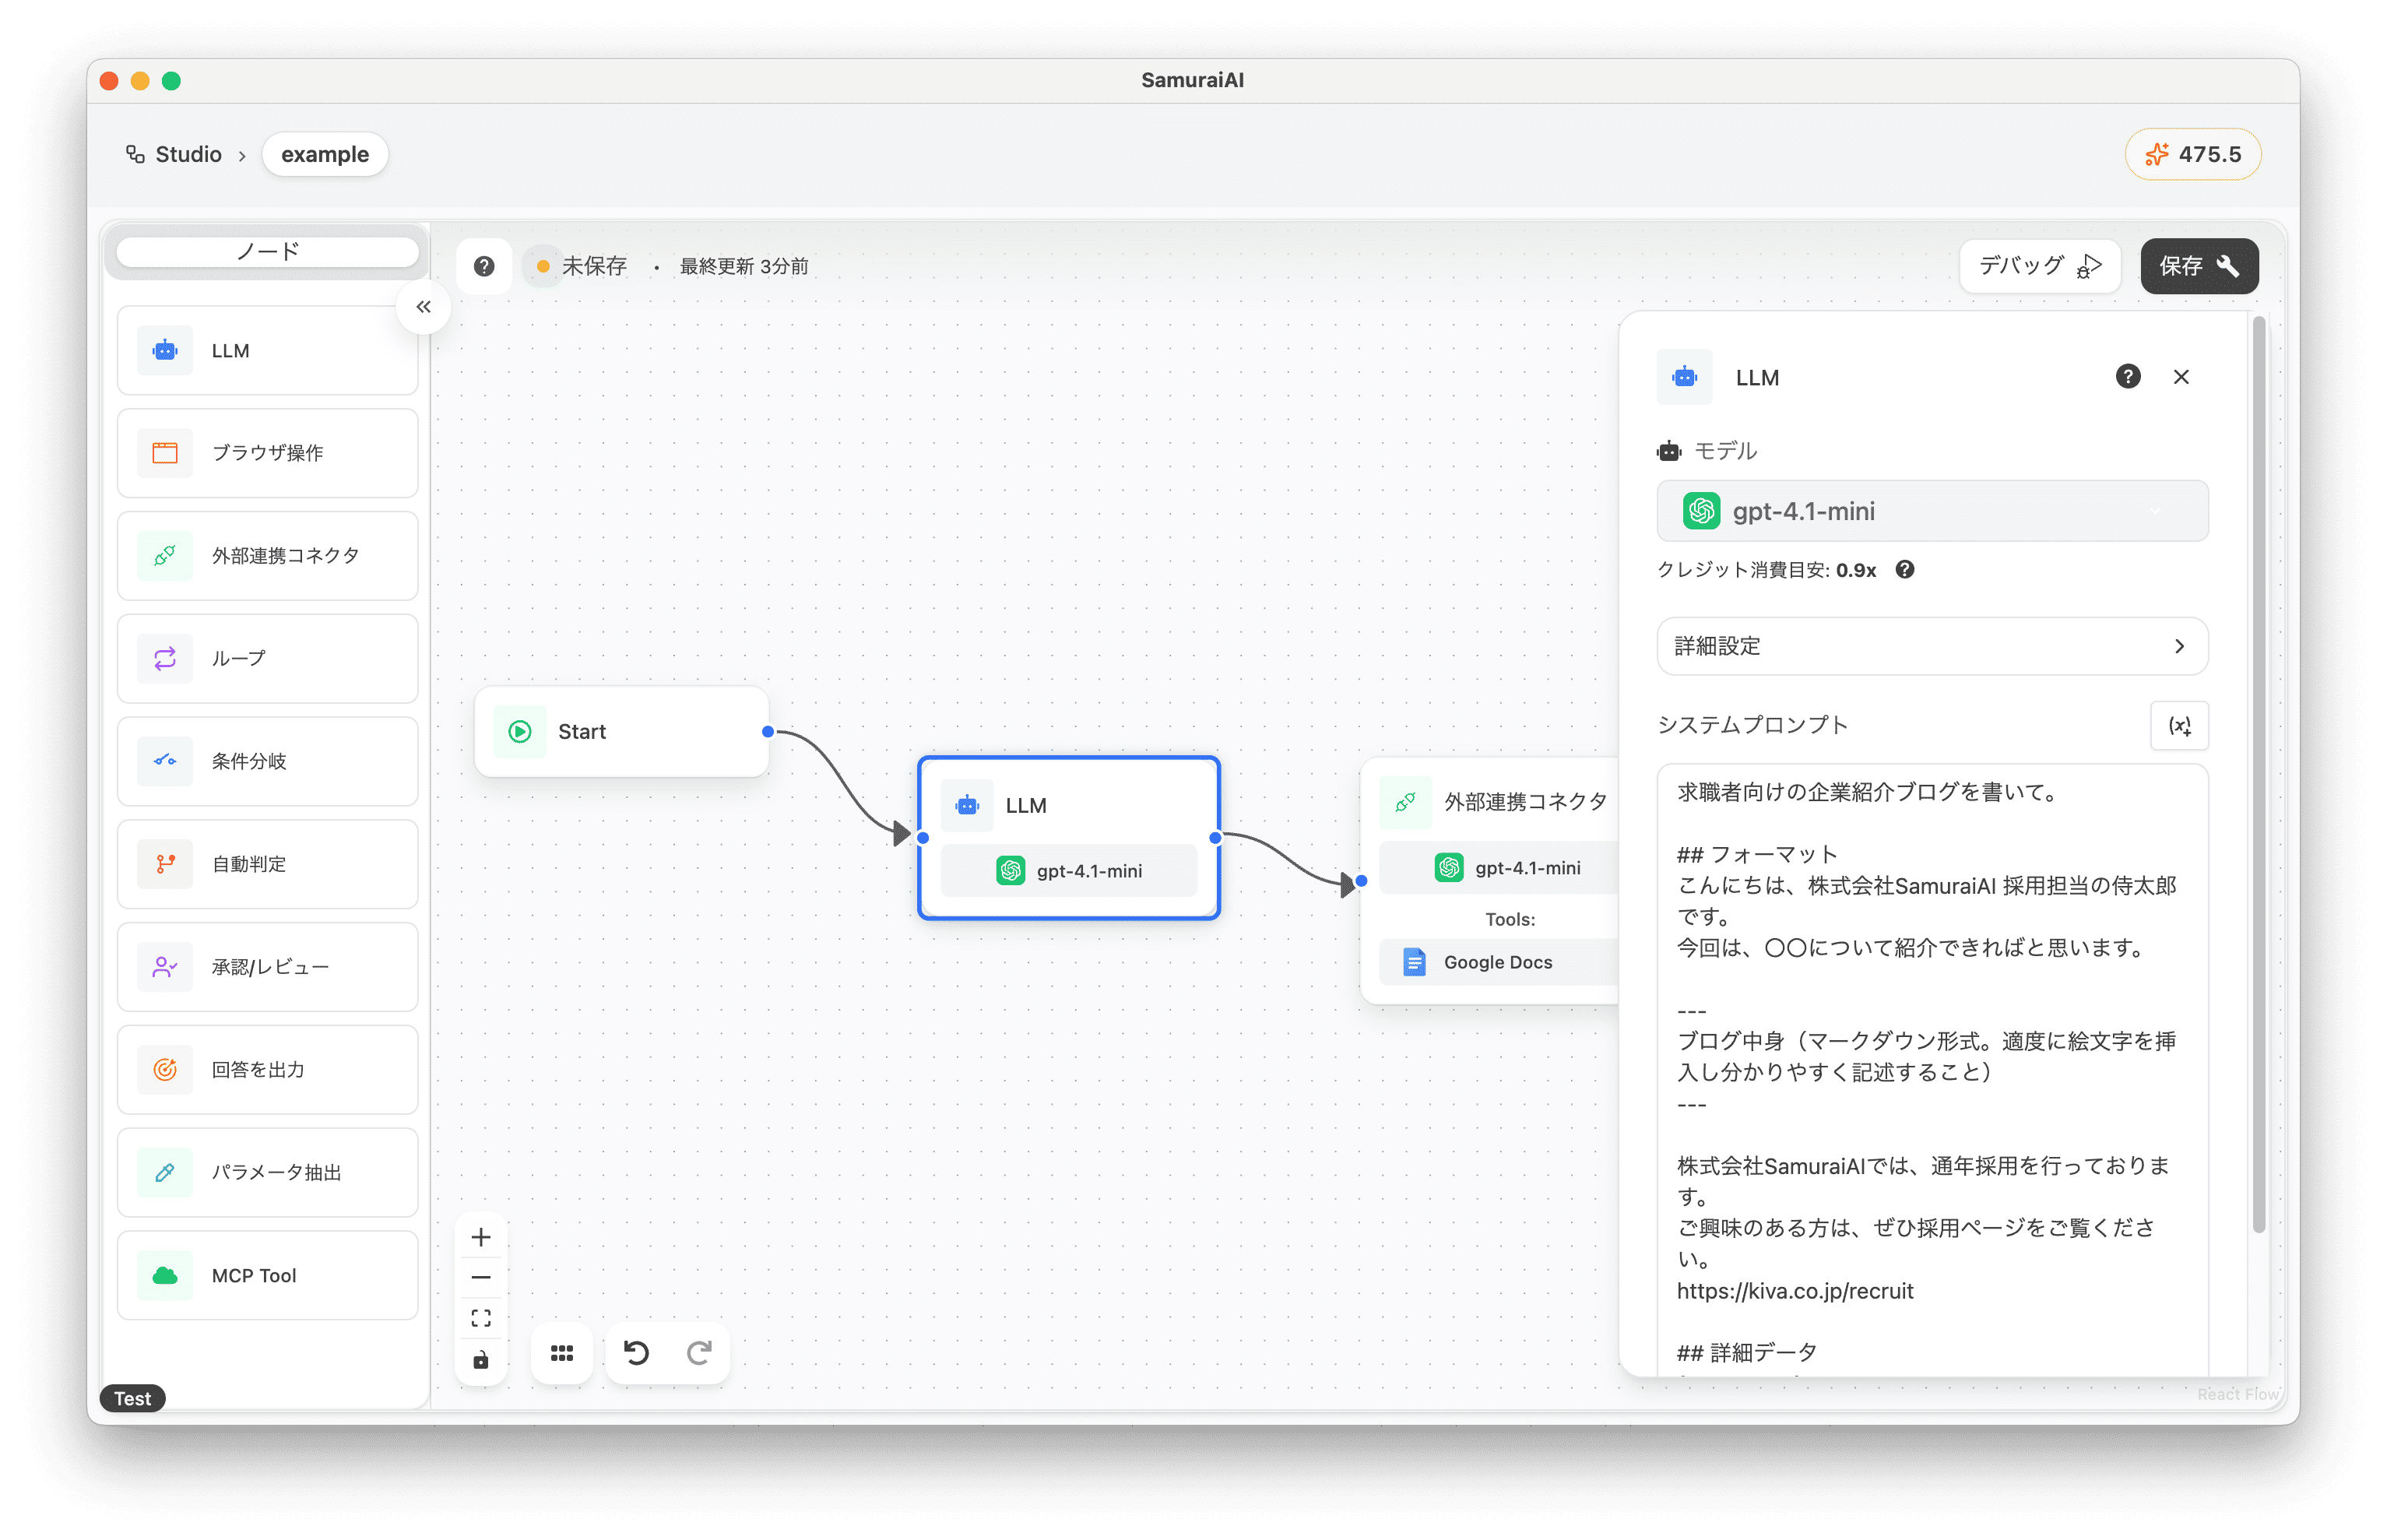
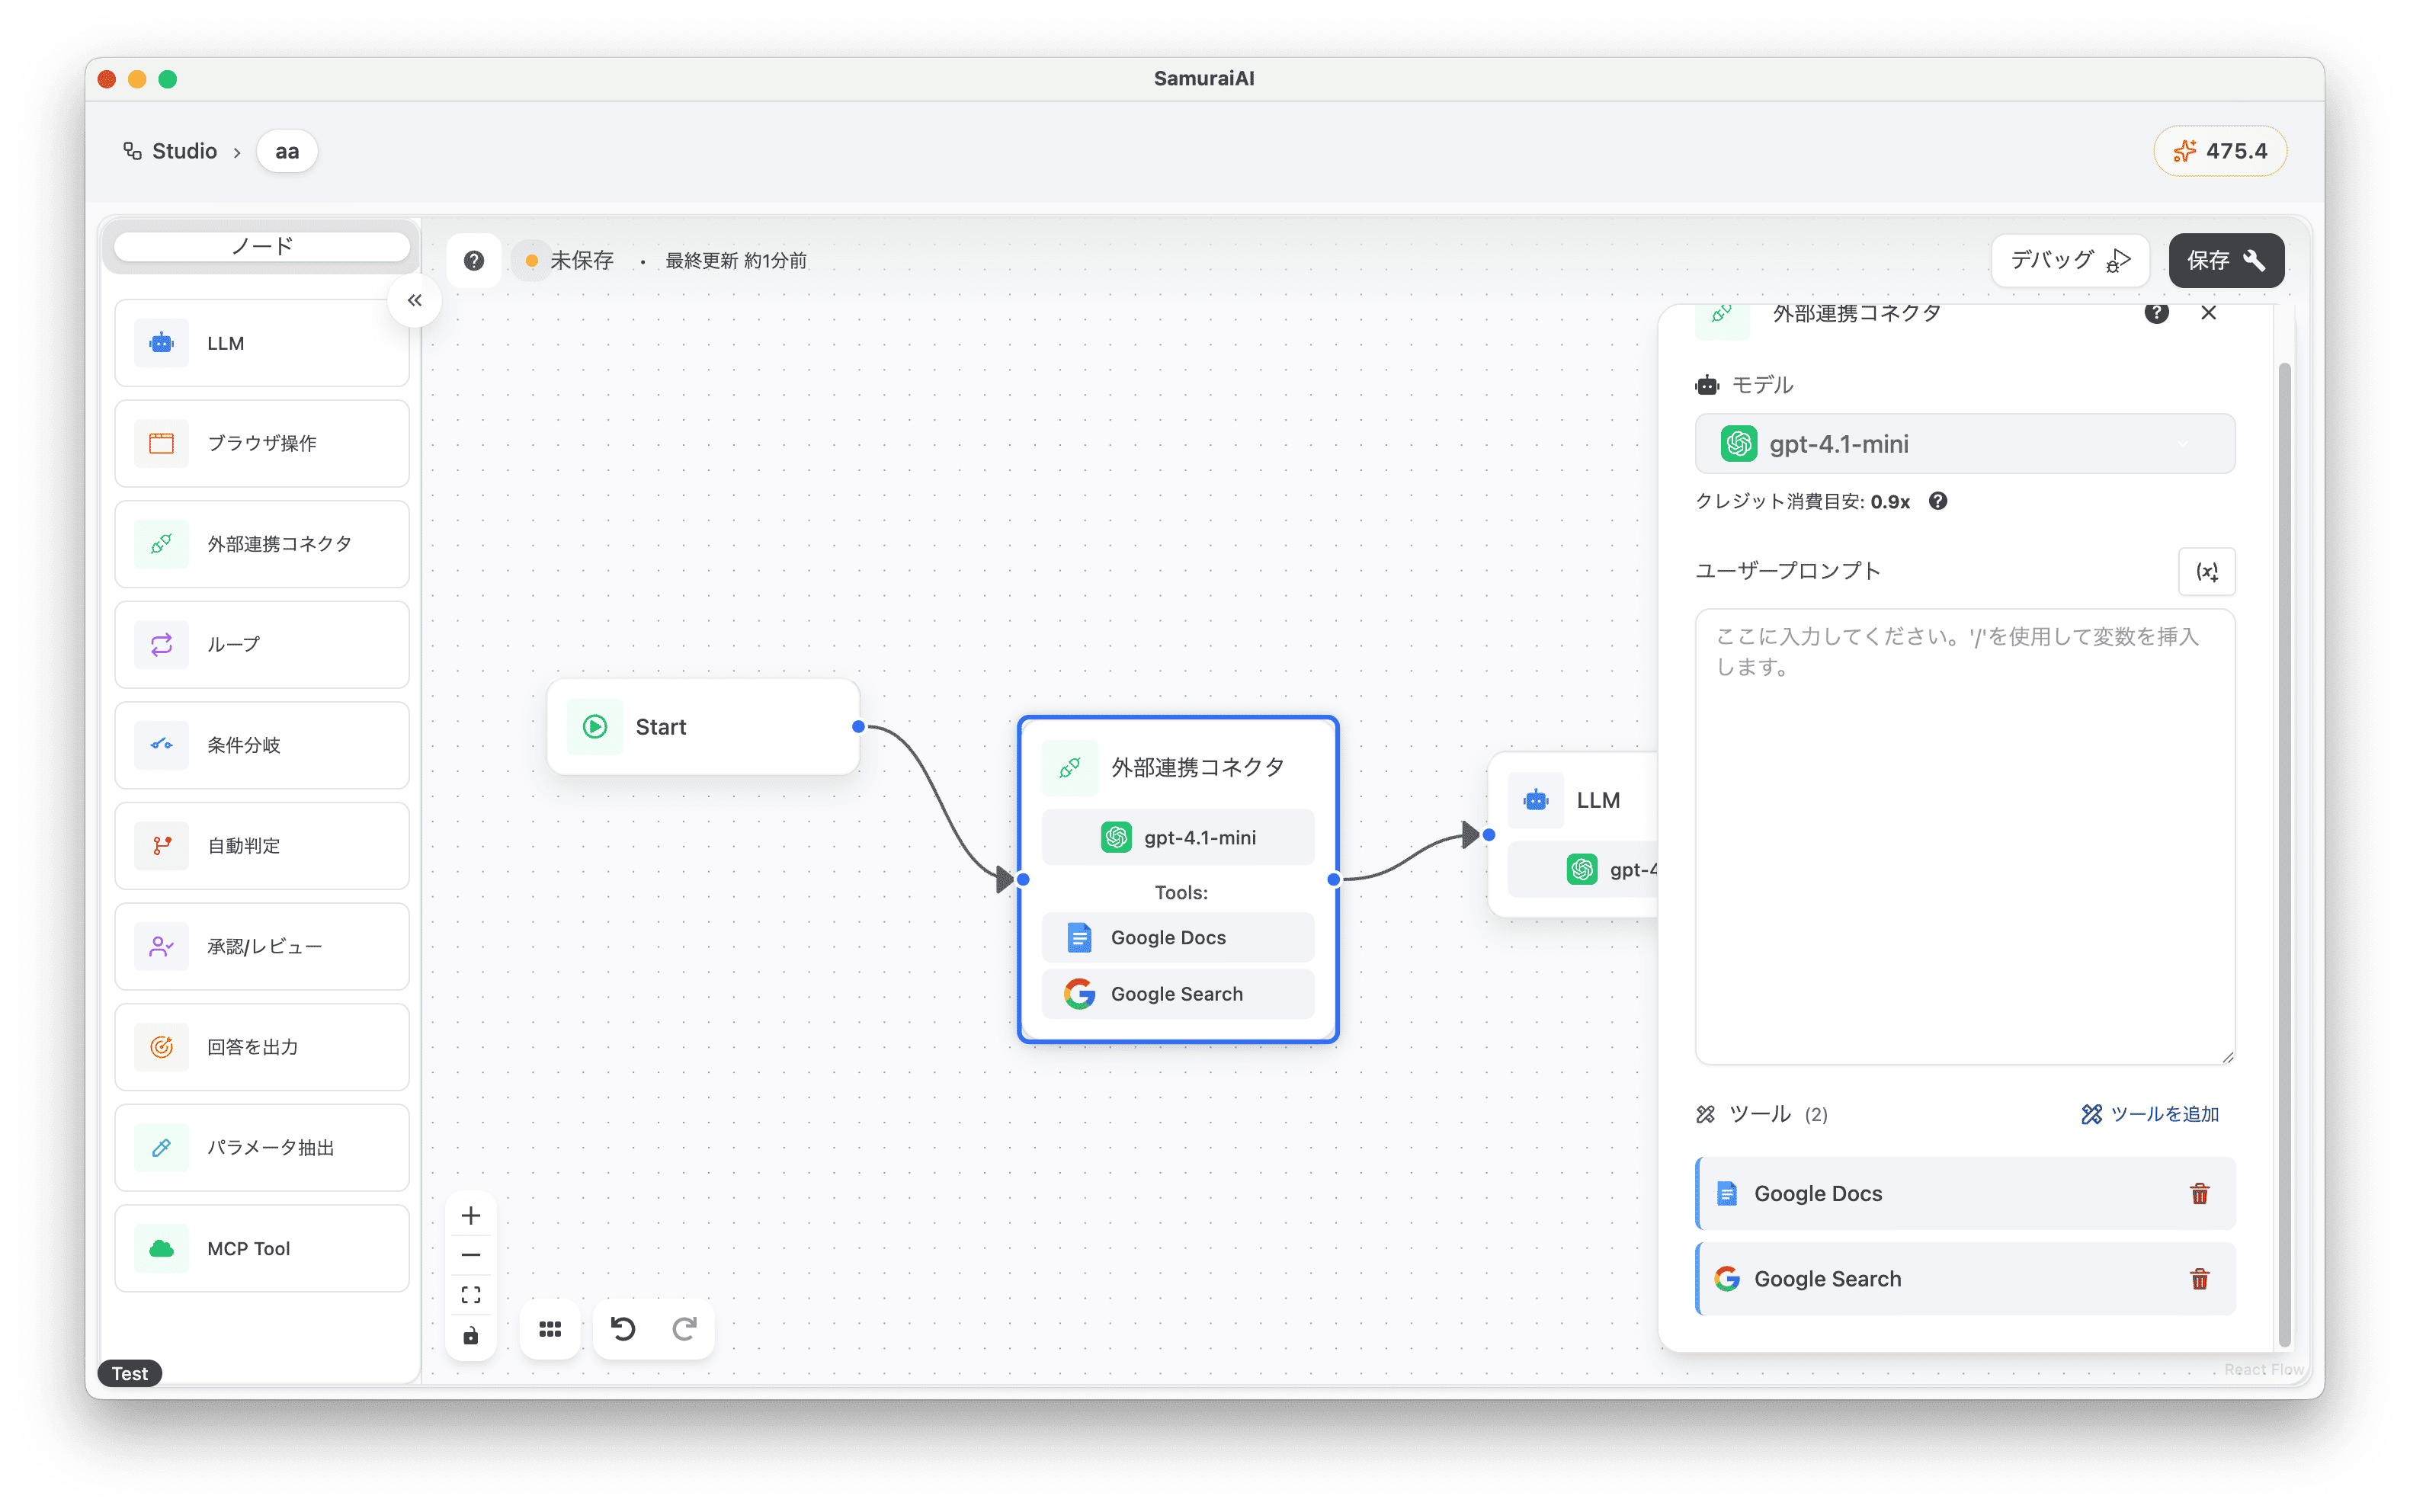
Adding the Connector Node
Section titled “Adding the Connector Node”Next, add an External Integration Connector to the right of the LLM node. Add the Google Docs connector from the tools. Also, copy and paste the following content into the prompt:
## TaskSave blog data to Google Documents.google drive url: {start.google_drive_url}
## Blog{llm-1.response}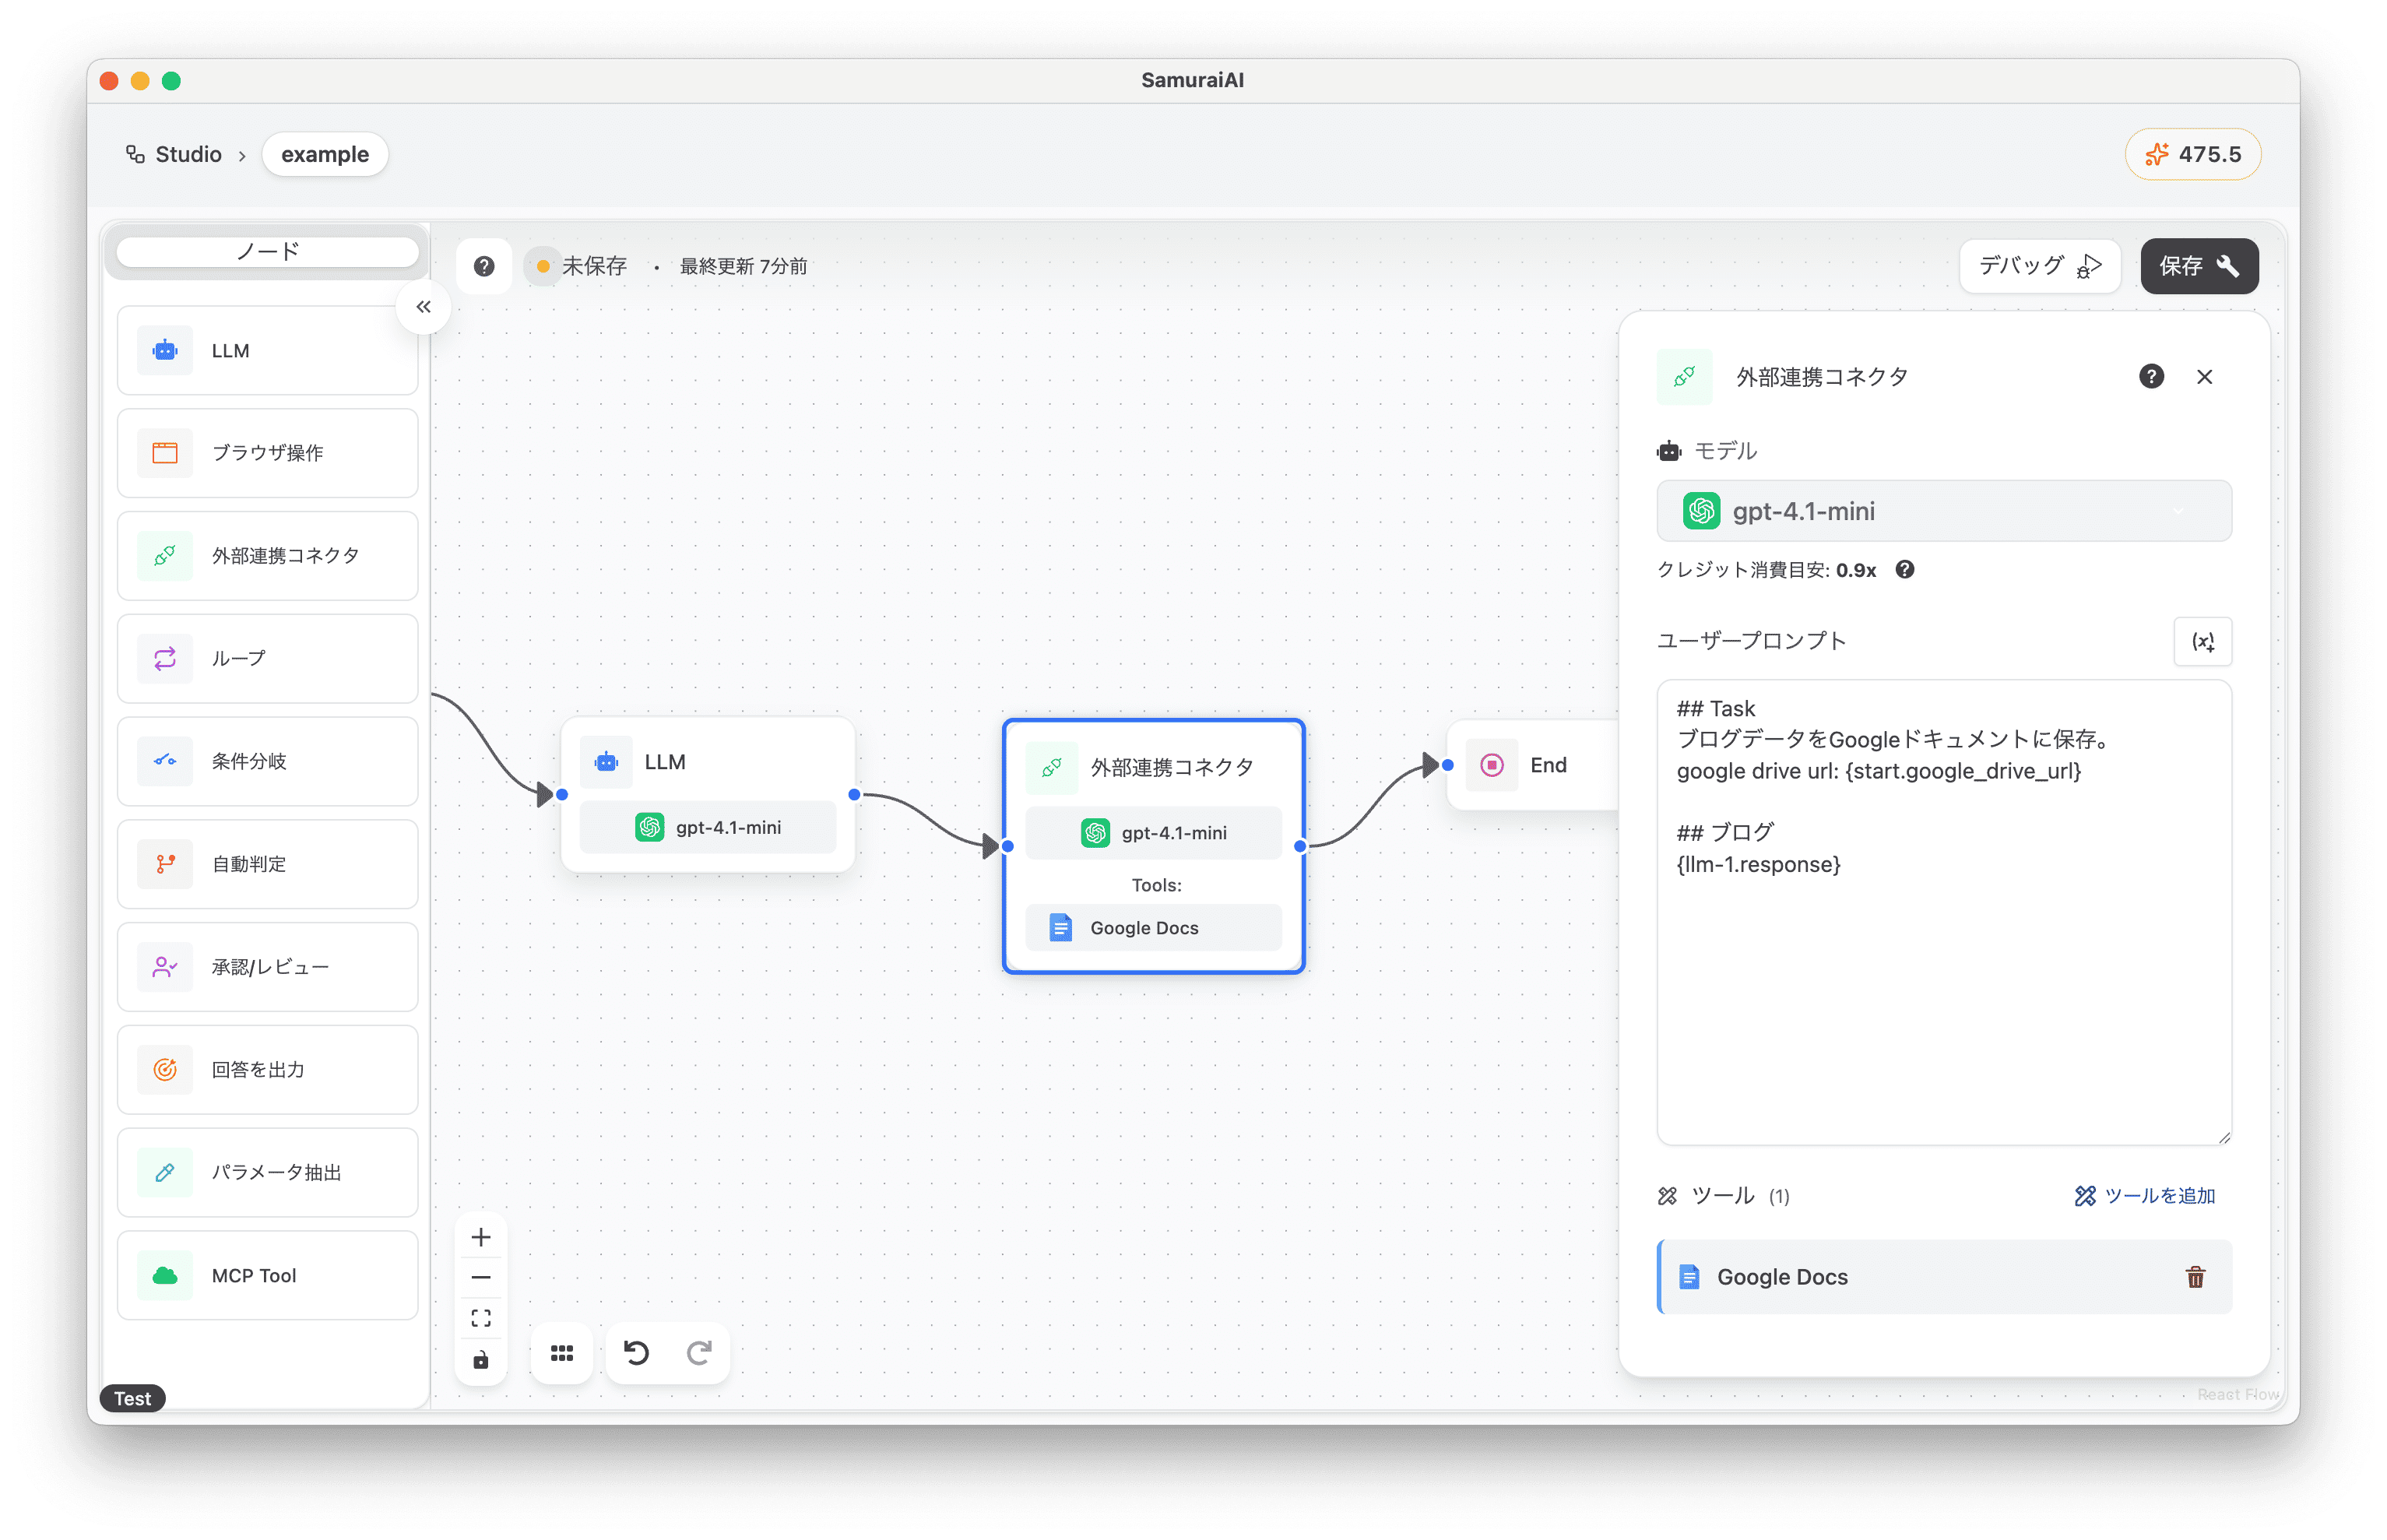
Setting Input Data
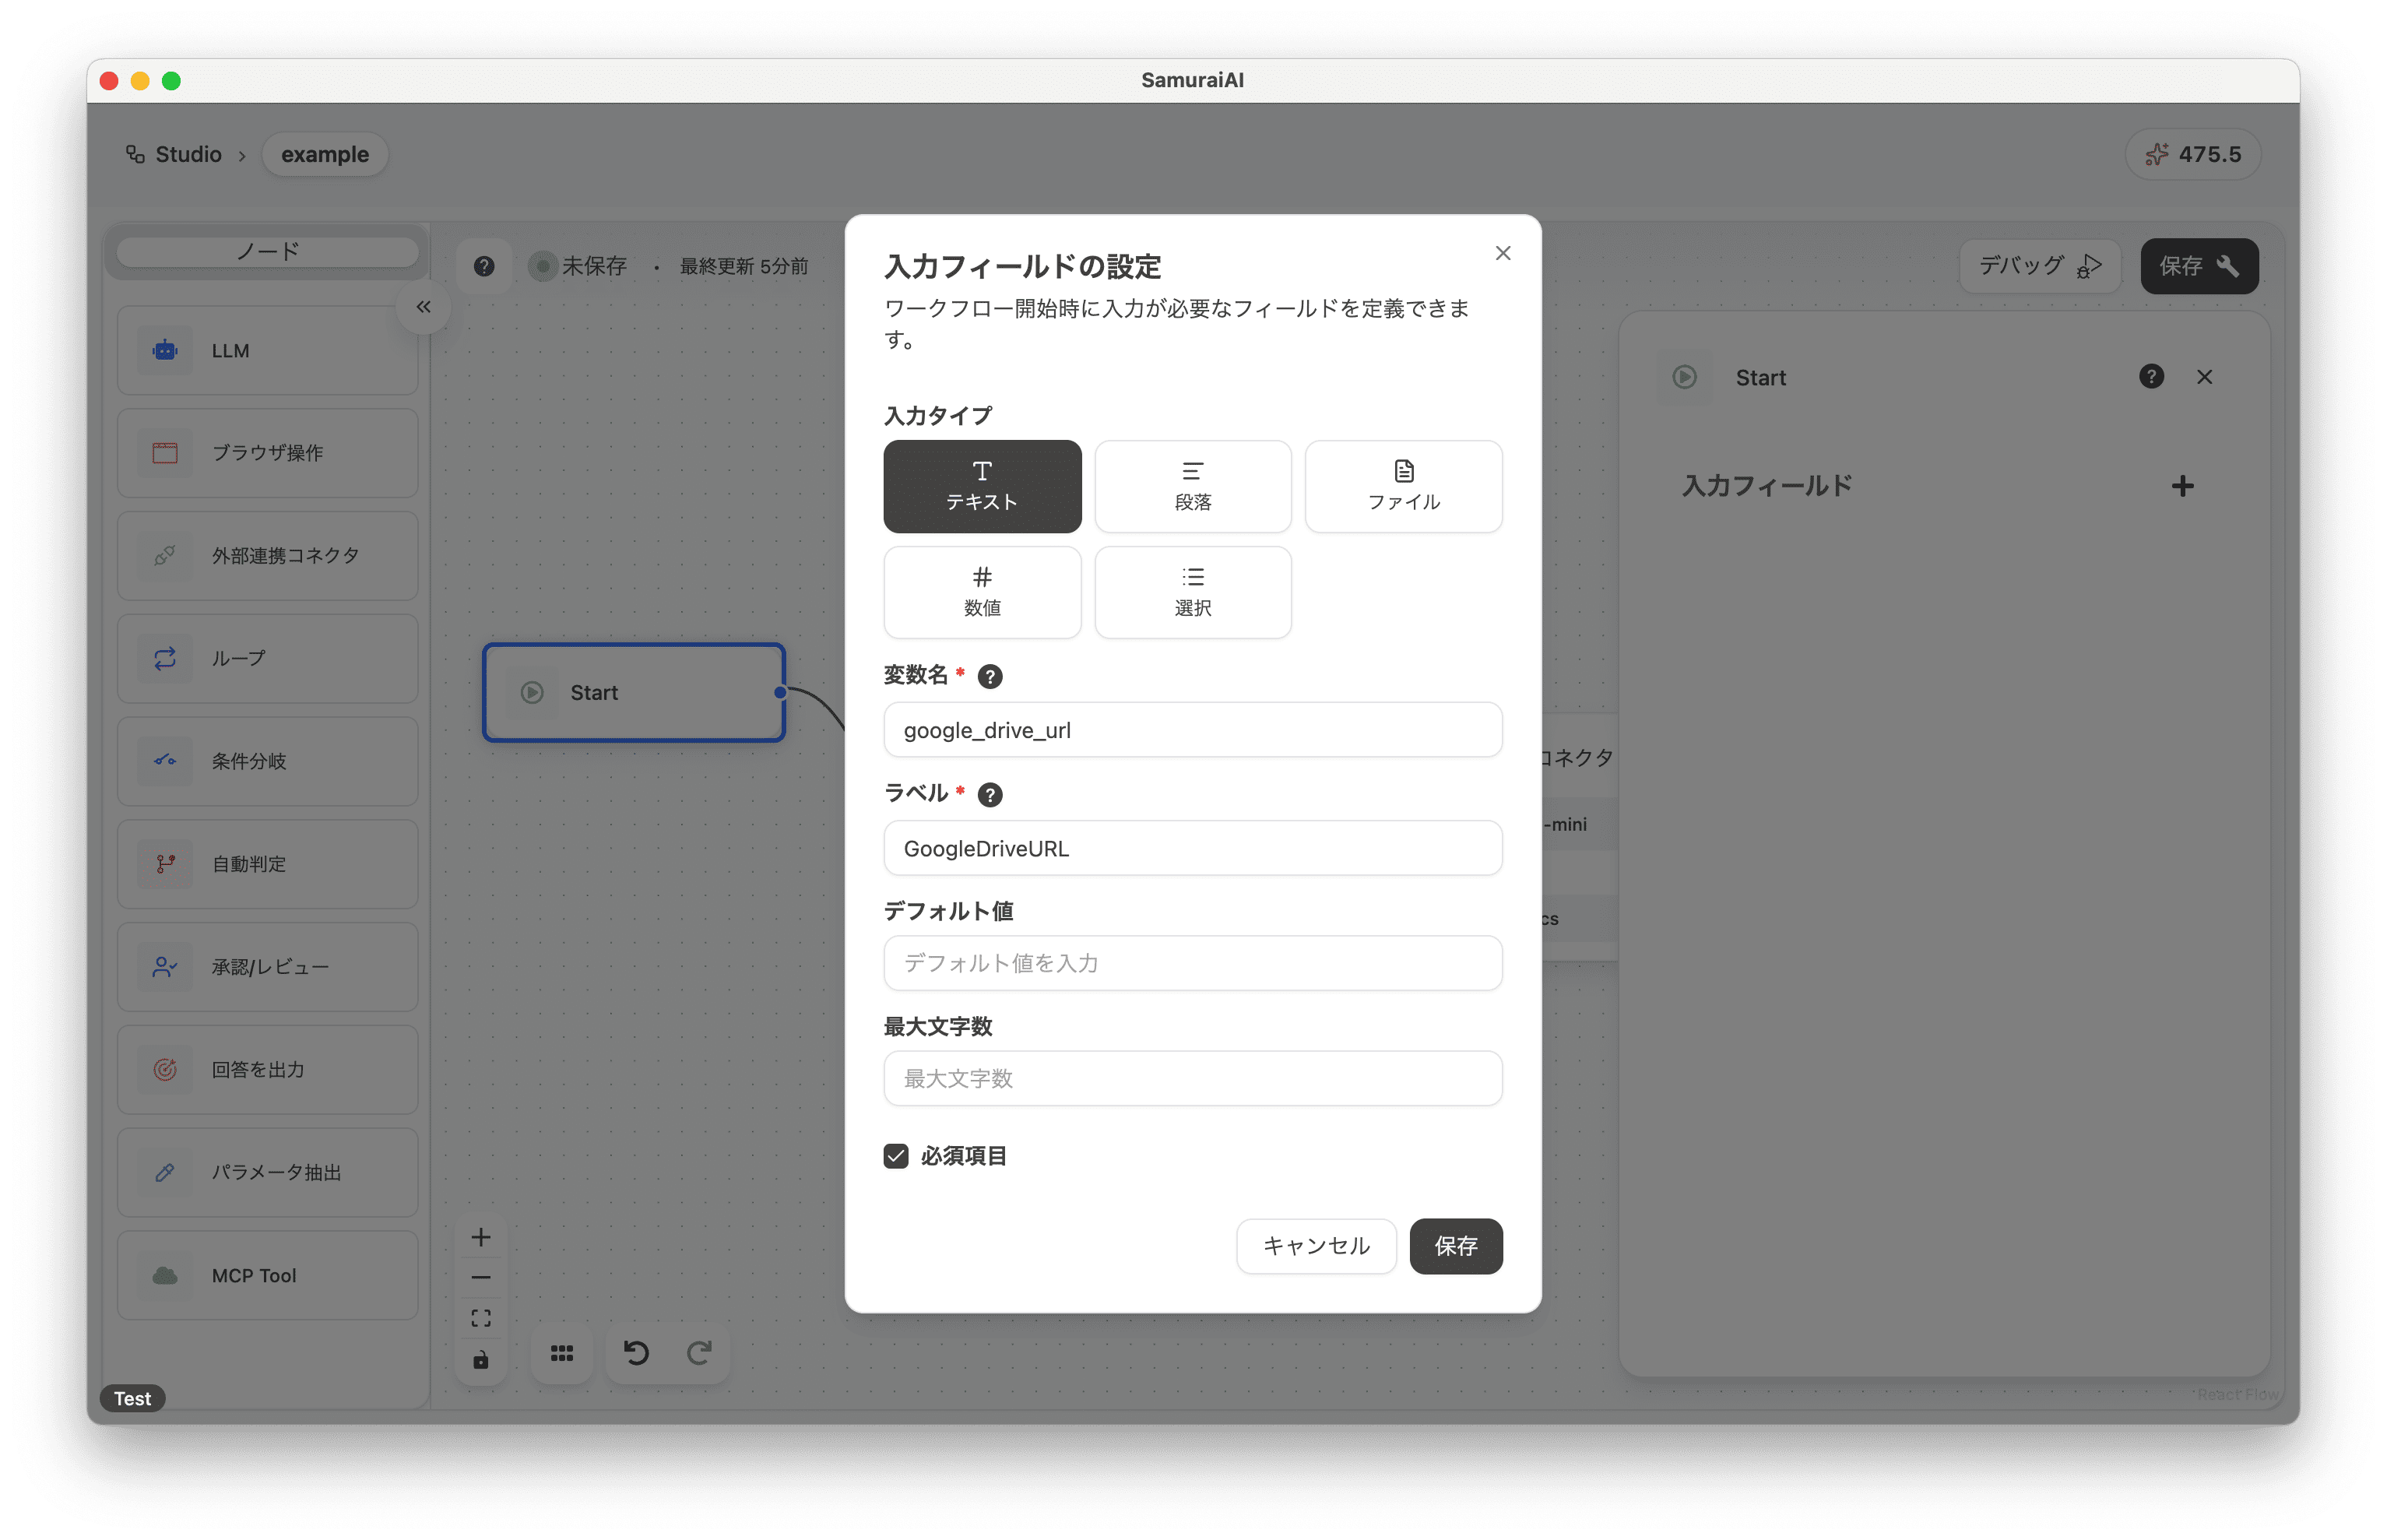
Section titled “Setting Input Data”Finally, click the Start node and configure the input data settings:
- Input Type: Text
- Variable Name: google_drive_url
- Label: GoogleDriveURL
- Required Field: On
Overall Workflow
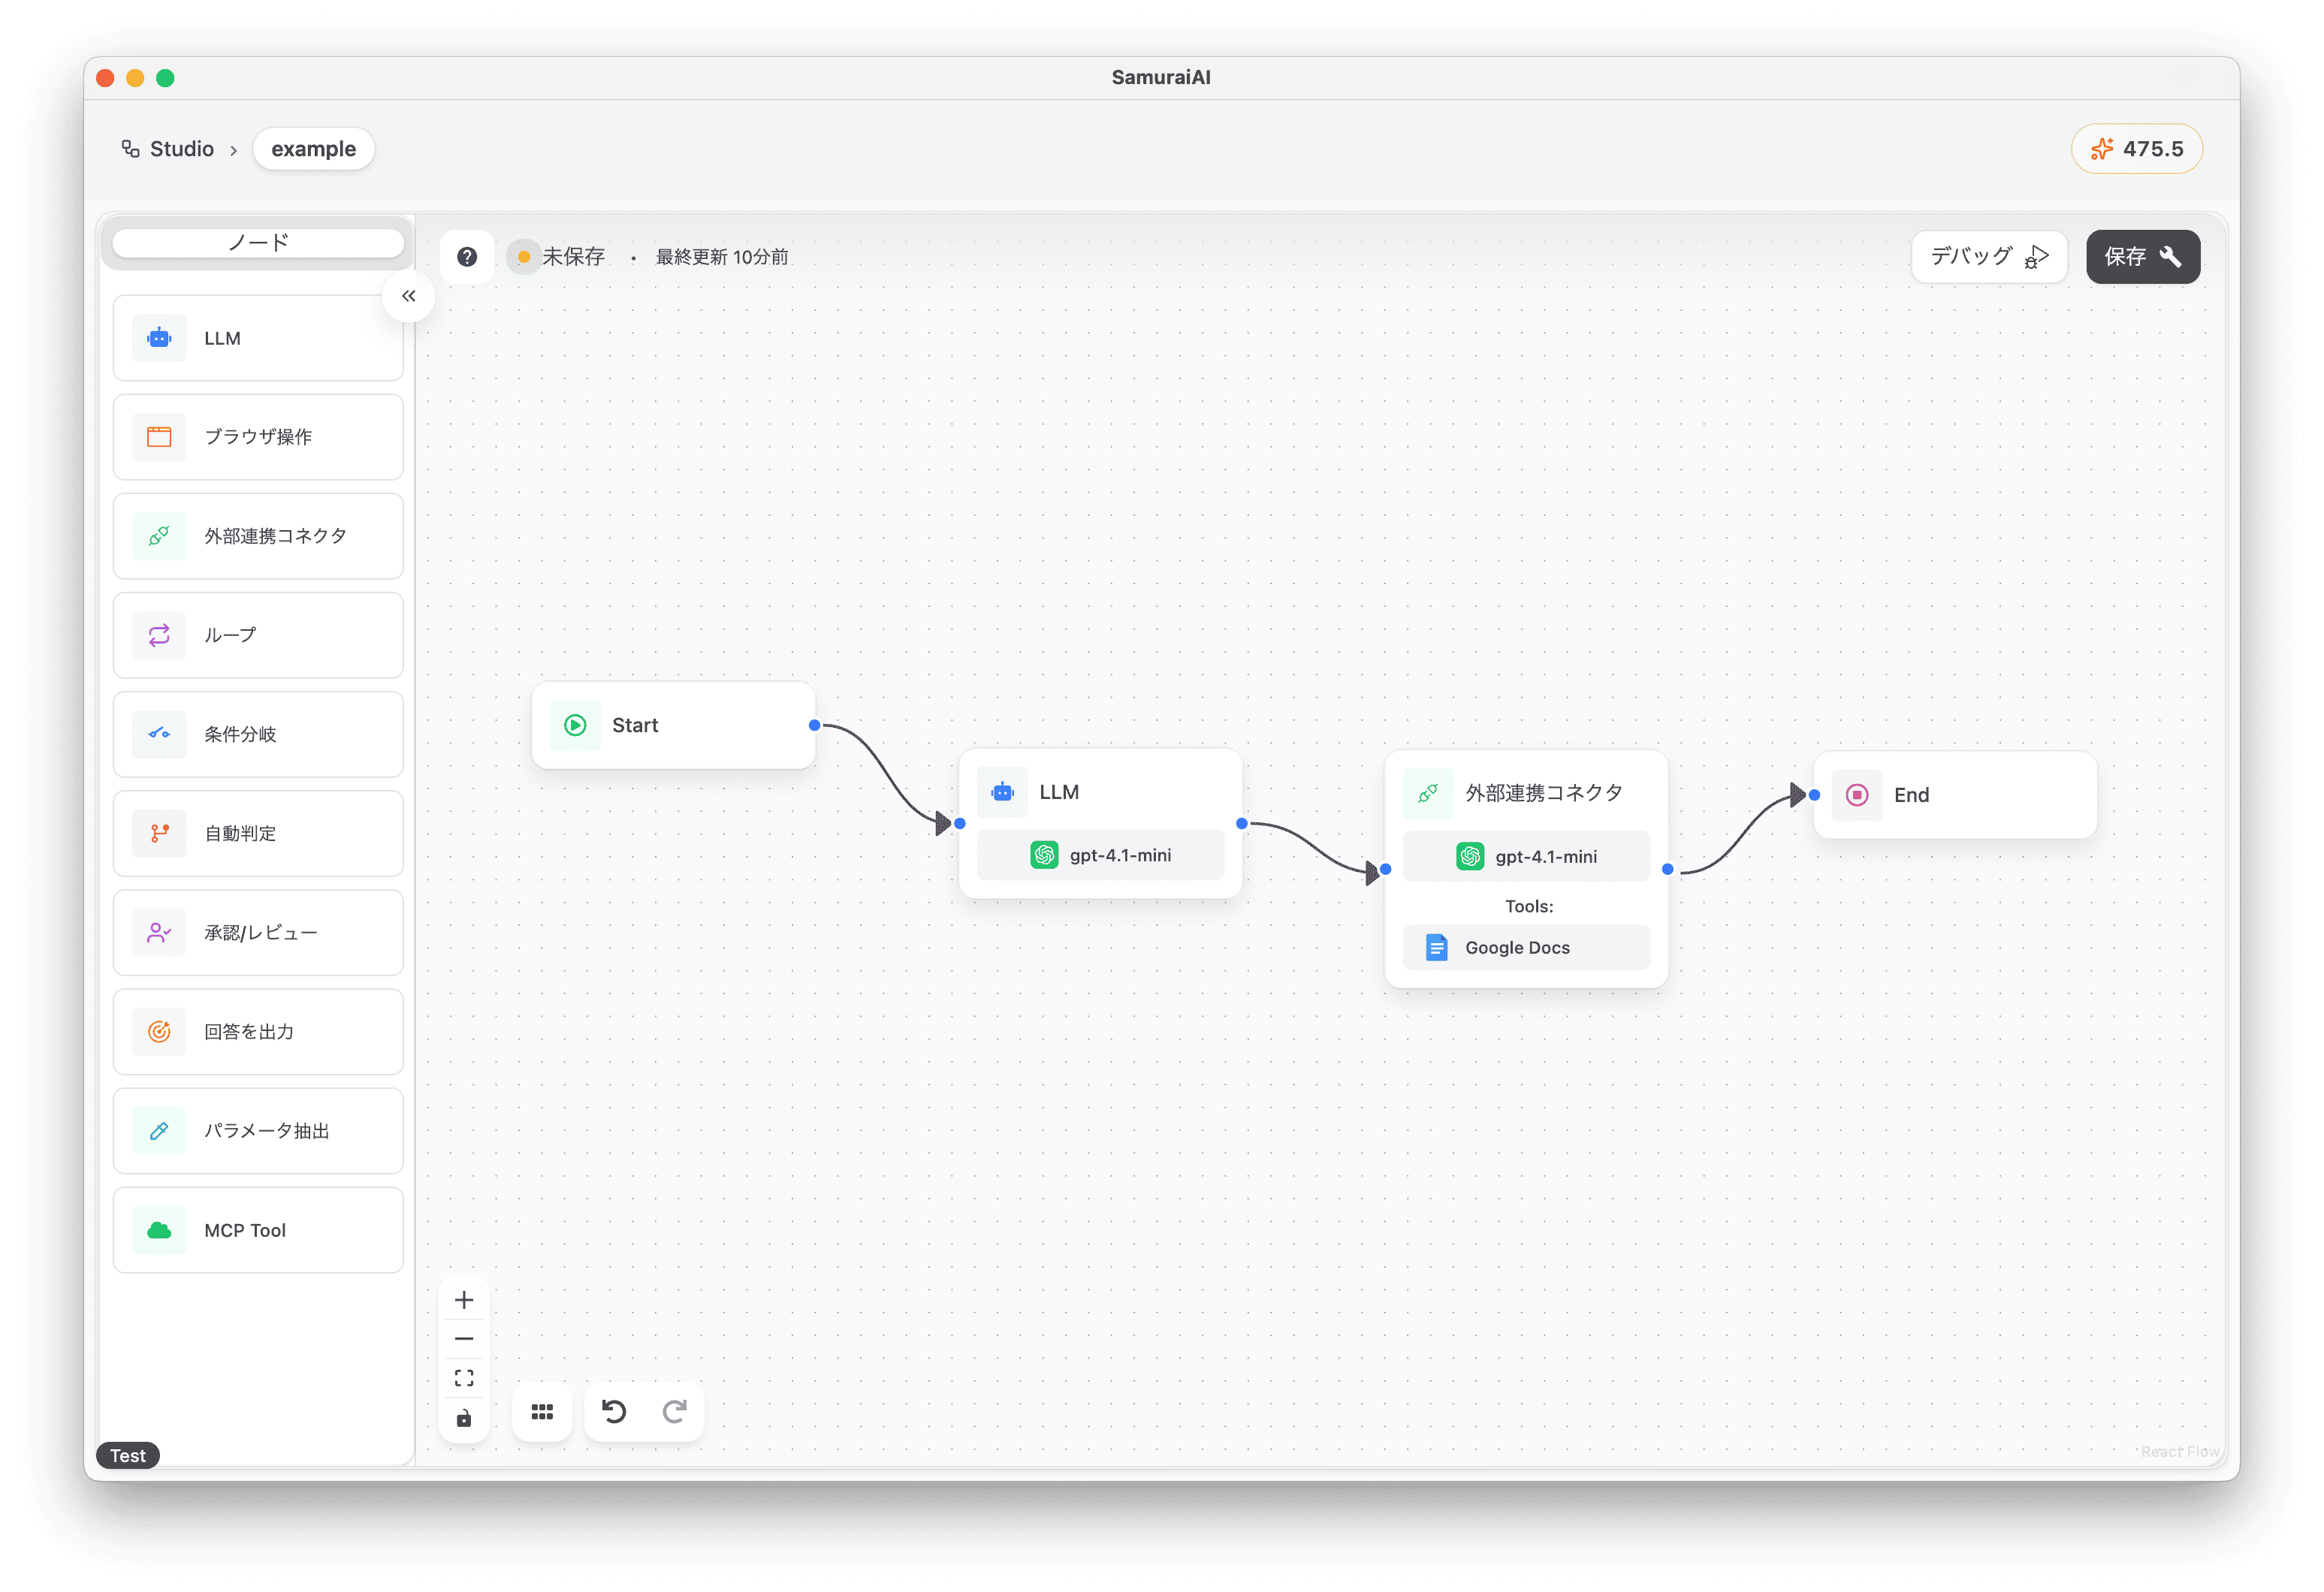
Section titled “Overall Workflow”The final workflow looks like this:
Running the Workflow
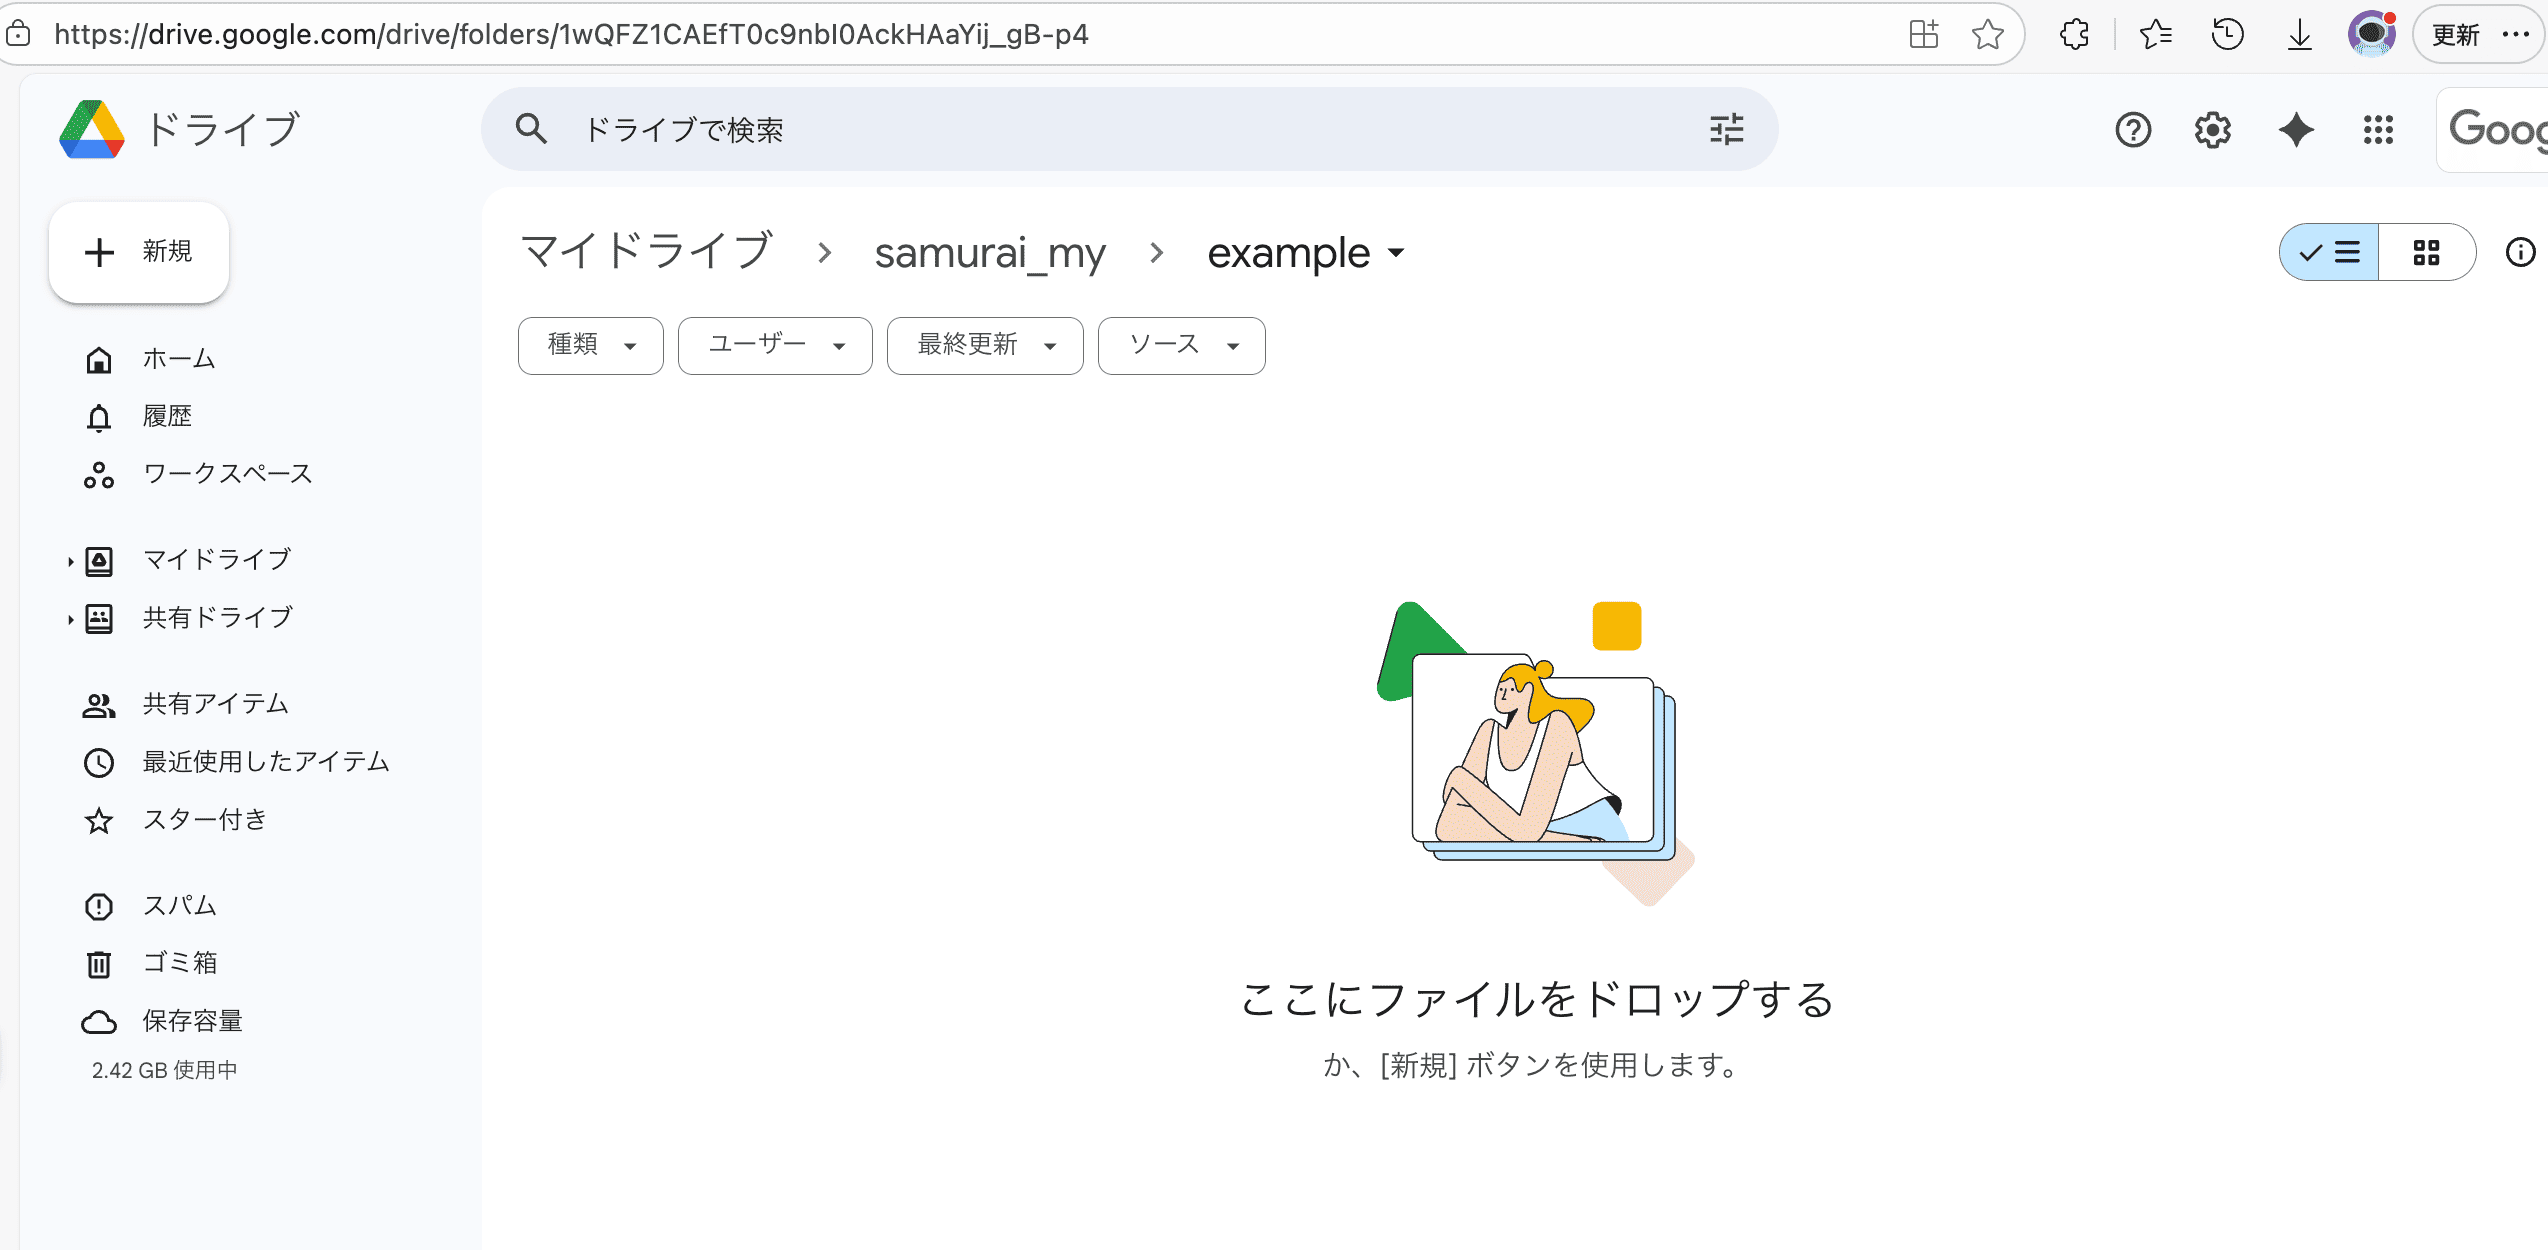
Section titled “Running the Workflow”To create a Google document, create a folder in Google Drive beforehand and note the URL.
Now you’re ready! Click the debug button to run the workflow. A sample chat message is as follows:
- GoogleDriveURL: Your Google Drive folder URL
Theme: We're doing referral recruitmentWhat is referral recruitment: A method of hiring new talent through introductions from employees.Benefits for job seekers:- Introduced to talent that matches the company culture- Smooth recruitment process- Comprehensive follow-up after job offerBenefits for our company:- Able to hire trustworthy talent- Reduction in recruitment costs- Reduced risk of early resignationVoices from employees who joined through referral recruitment:- "By joining through a friend's introduction, I knew the company atmosphere in advance and can work with peace of mind."- "Thanks to the referrer's support within the company, I was able to smoothly adapt to my work."Specific measures to promote referral recruitment:- Introduction of employee referral system- Providing incentives to referrers- Holding regular referral recruitment events- Activating internal communicationSummary:Referral recruitment has many benefits for both companies and job seekers. Our company actively promotes referral recruitment and has created an environment where each employee can contribute to the company's growth.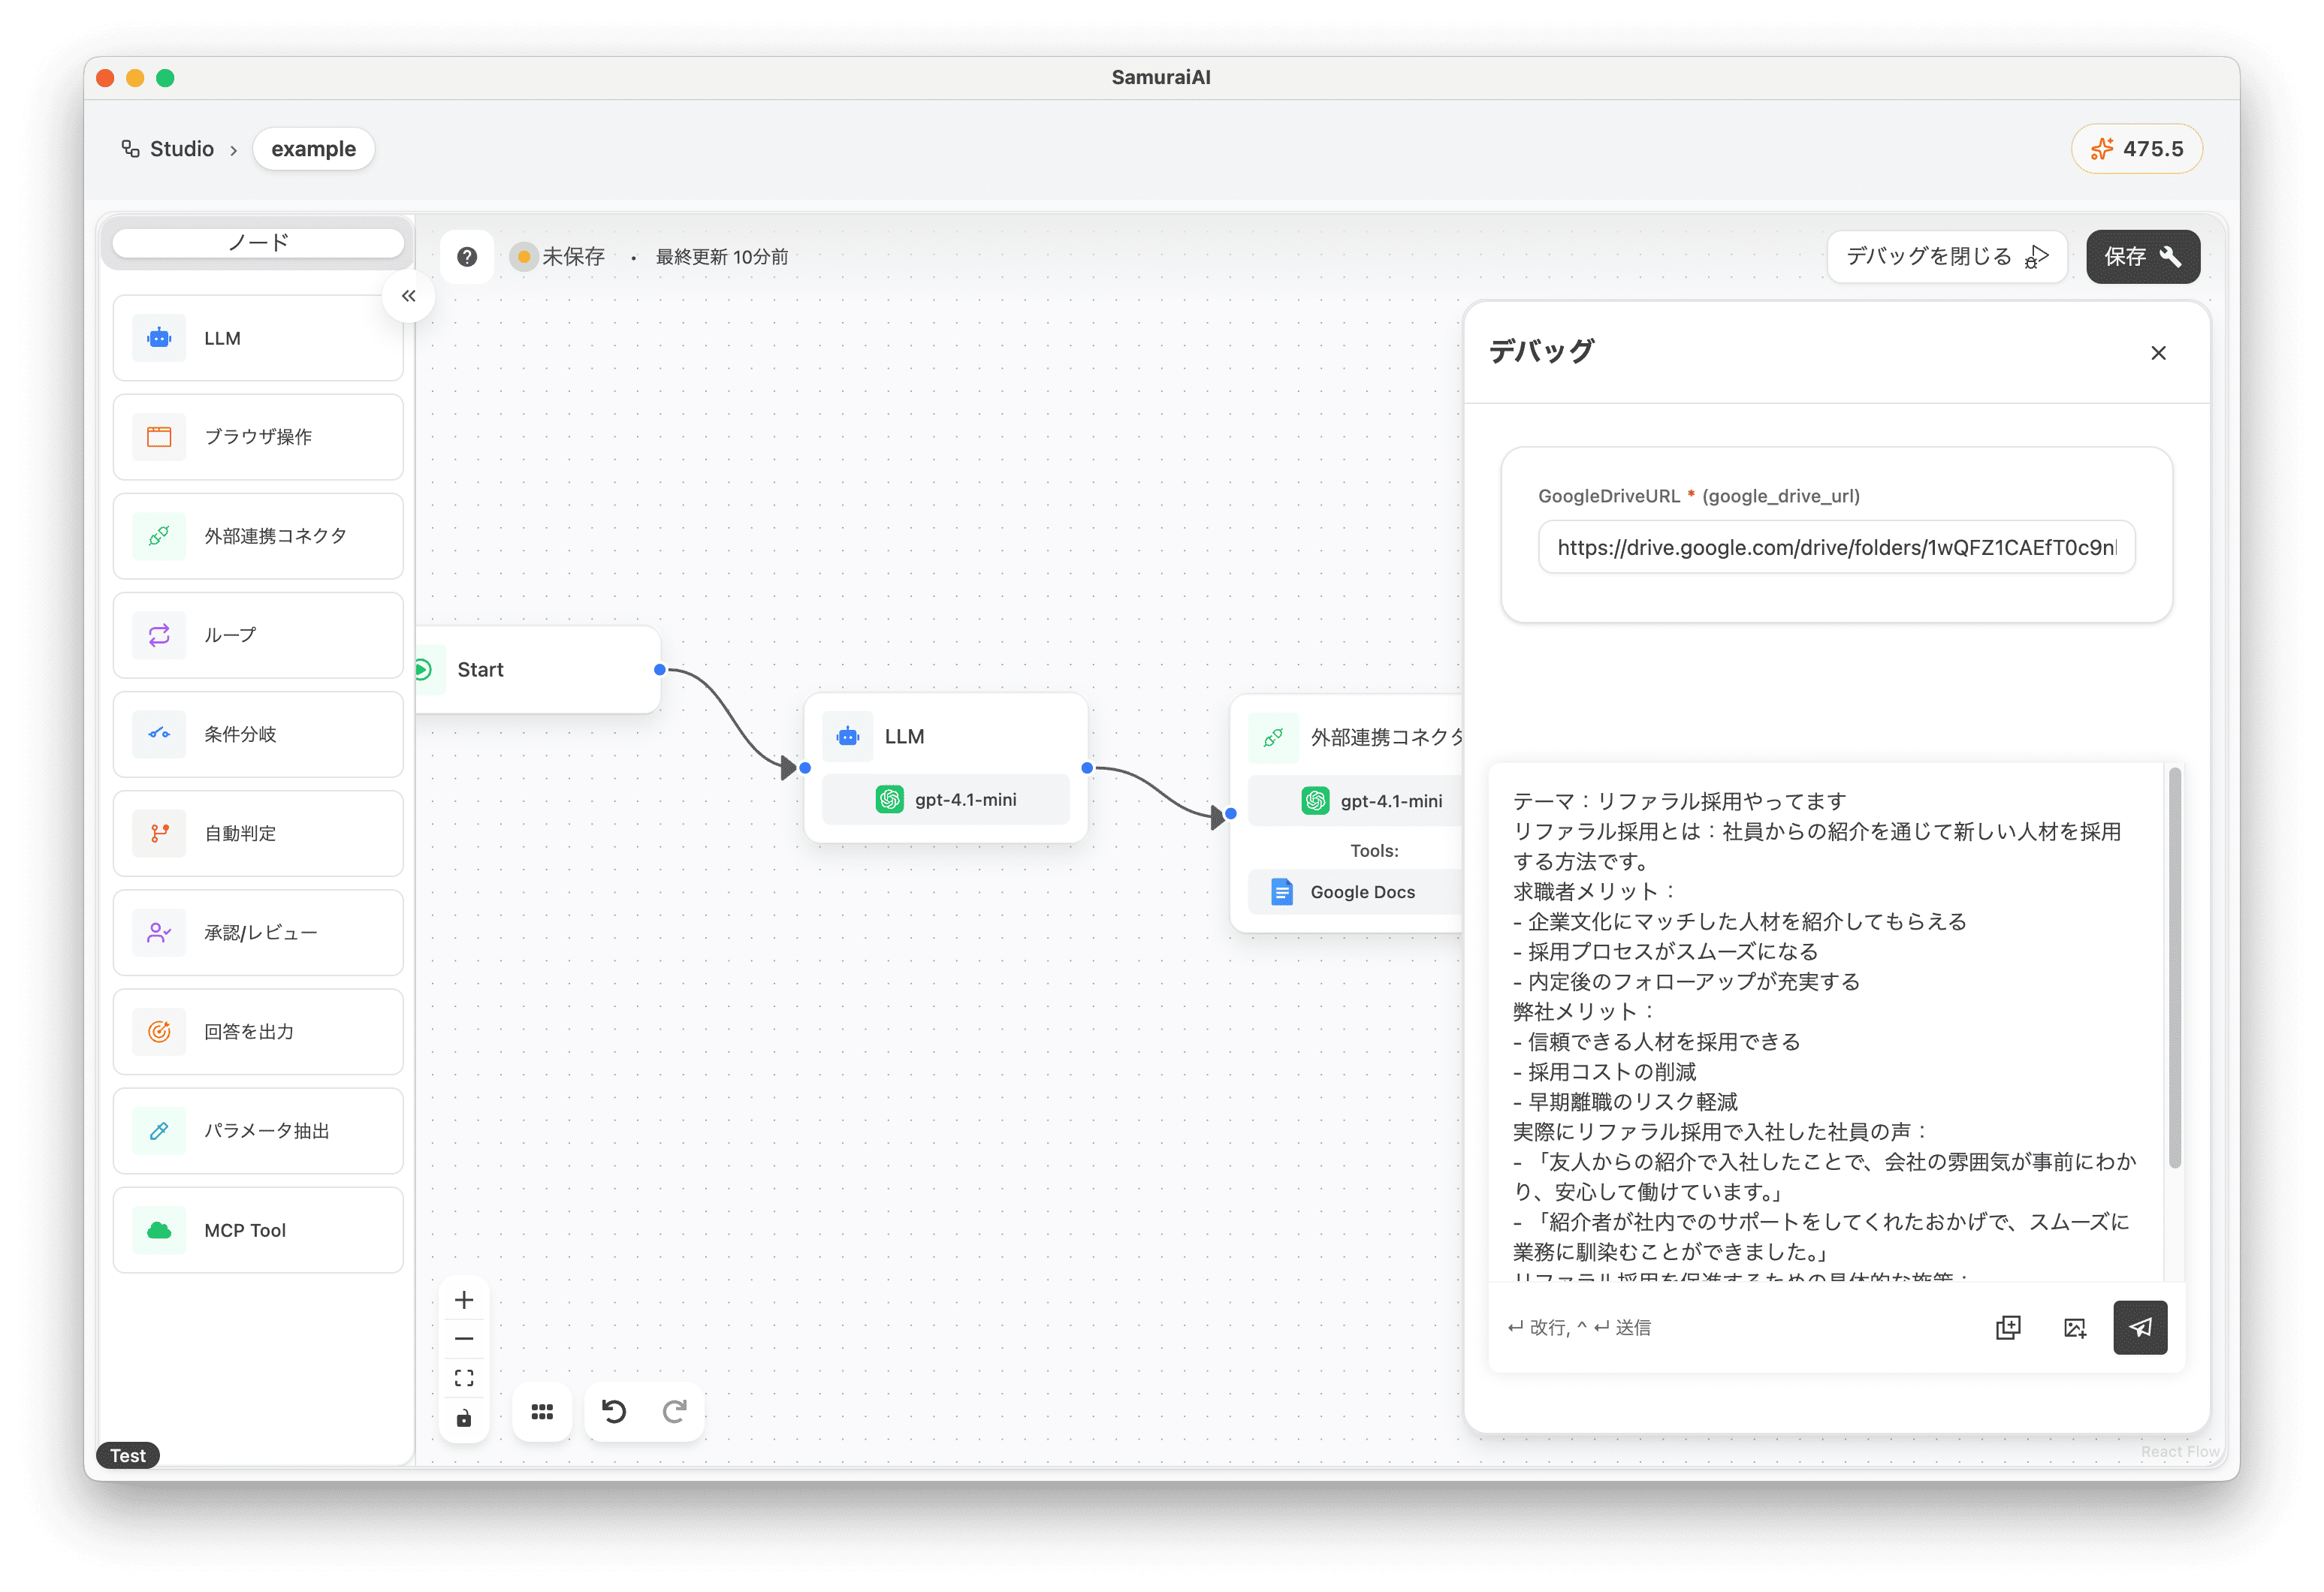
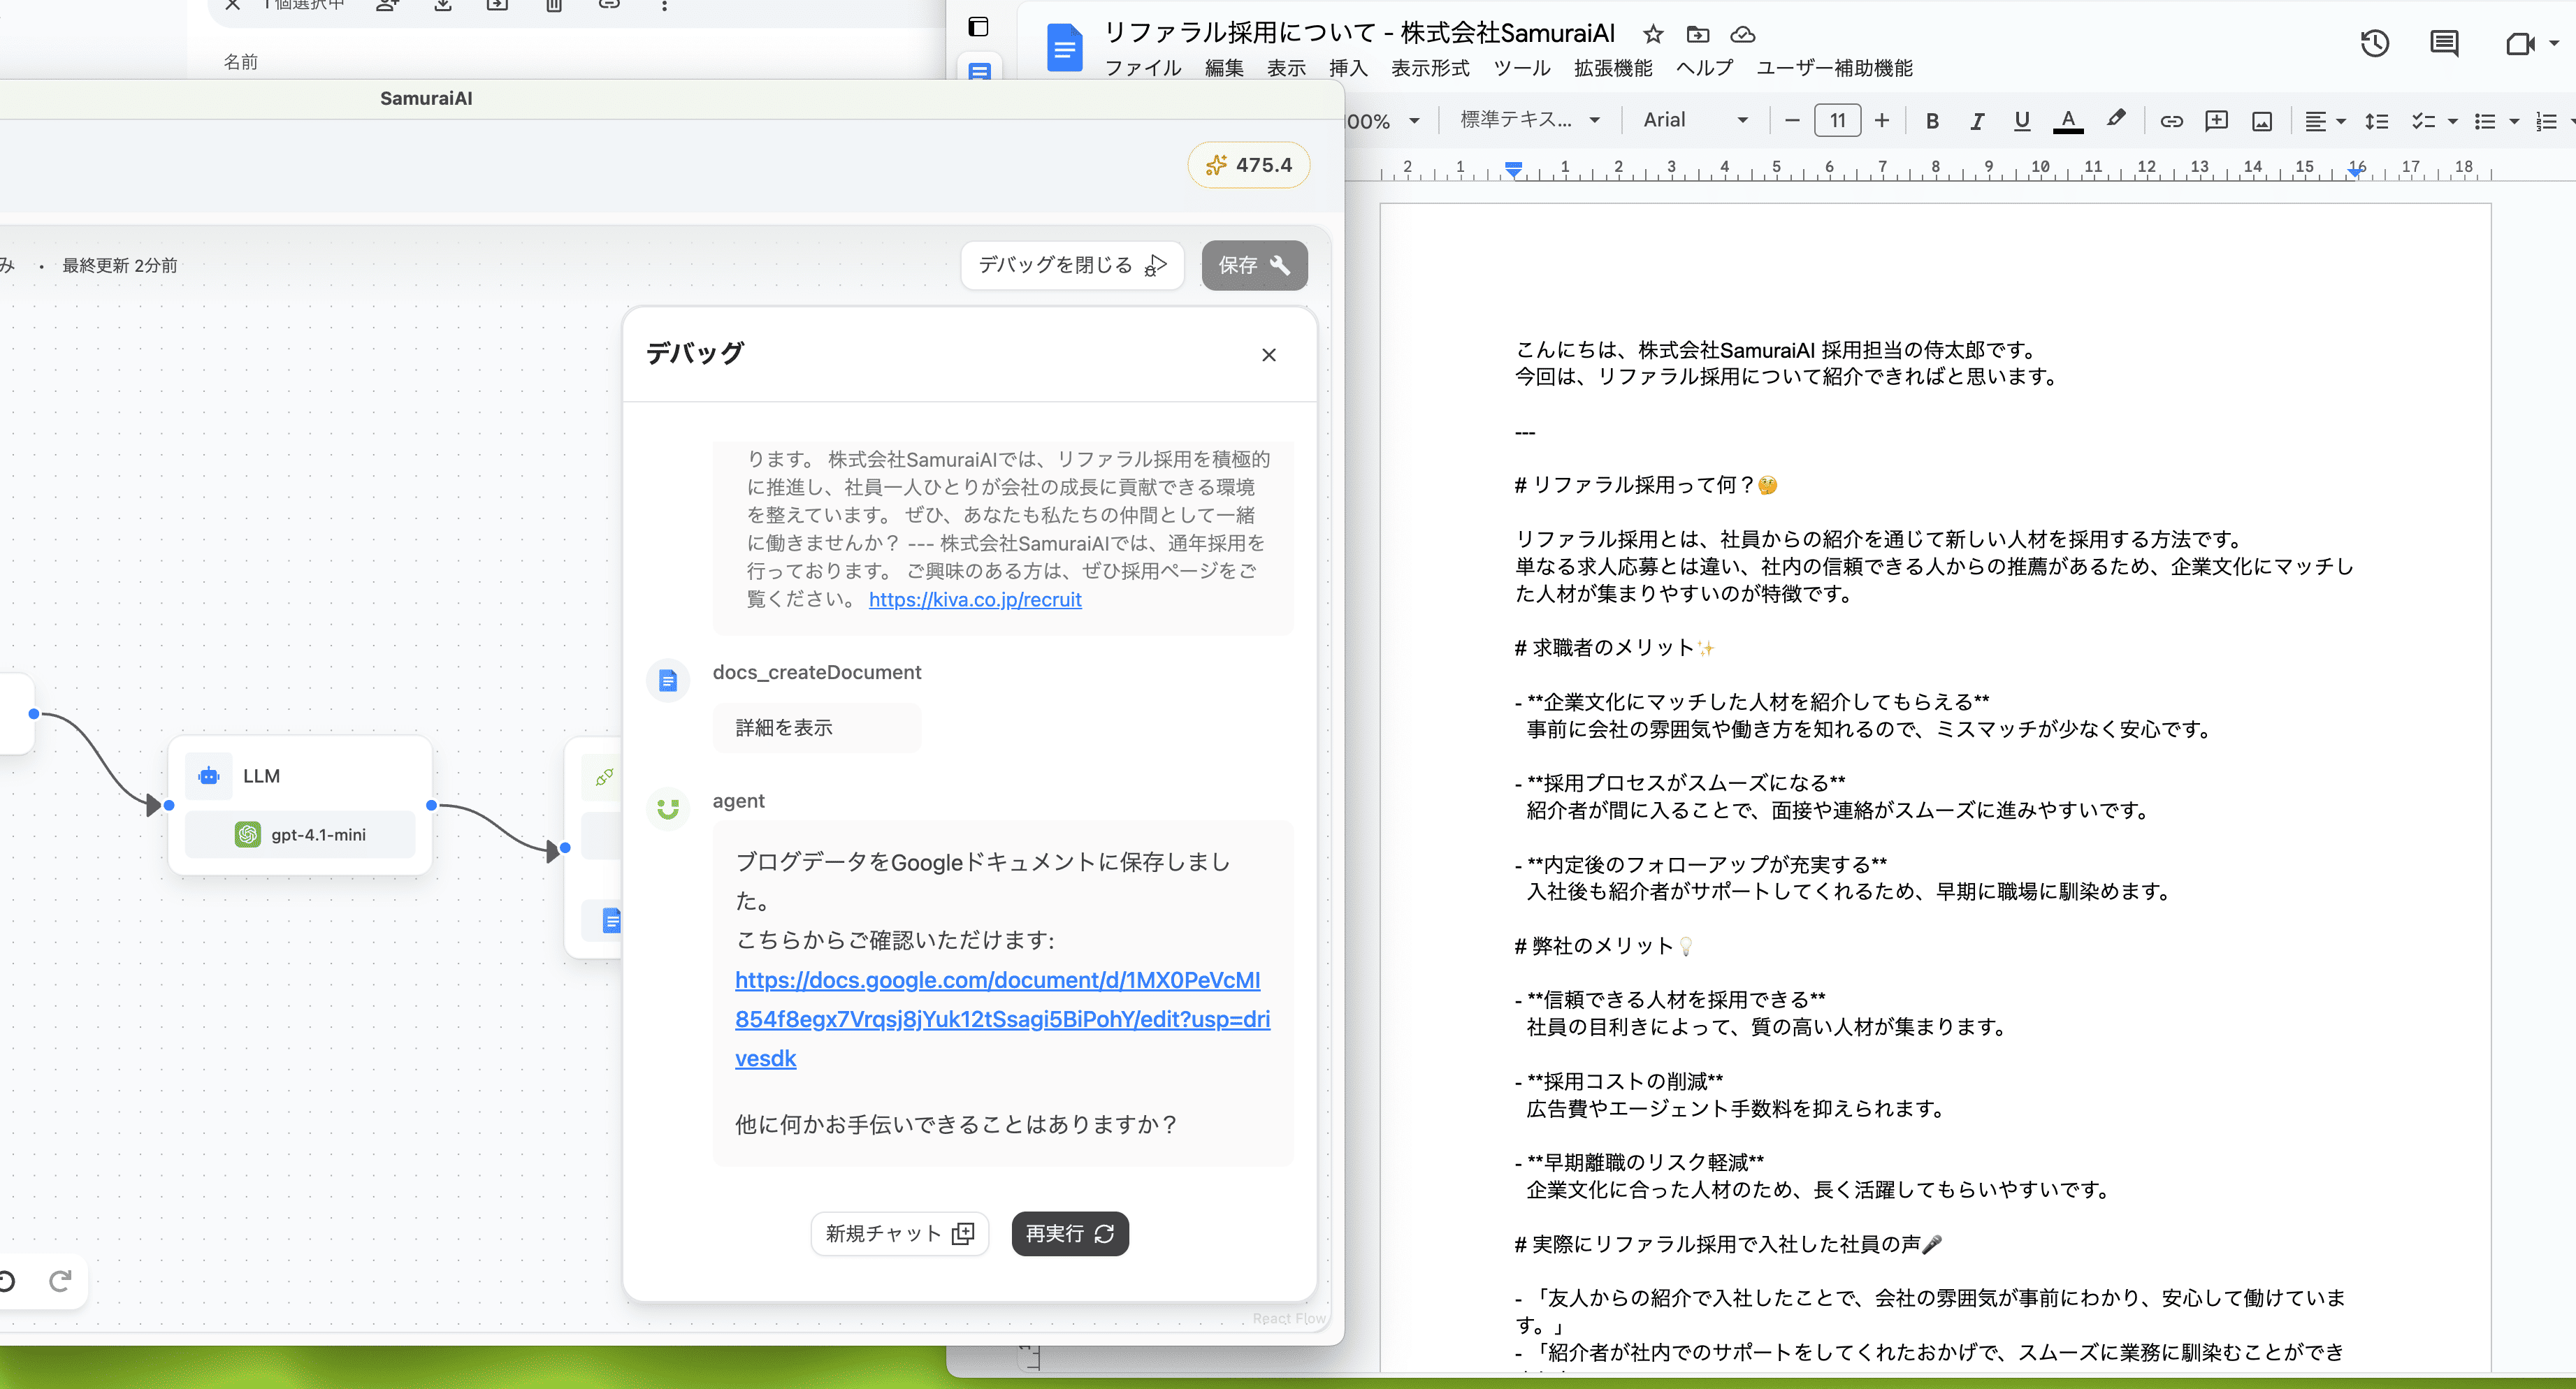
After entering the above and executing, a blog was generated in the predefined format and saved to Google Docs 🚀
Troubleshooting
Section titled “Troubleshooting”Authentication Expiration Error
Section titled “Authentication Expiration Error”With some connectors, authentication may expire after a certain period from initial authentication. In that case, when running the workflow, the following error will be displayed:
Failed to initialize graph: Your credential not found. Please authenticate: コネクタ名To resolve this, re-authenticate by following these steps:
- Click “Connect” at the top of the menu screen.
- Click the connector you’re using.
- Click the “Re-authenticate” button and authenticate again.
Last updated: