

Webhook
The Webhook feature allows you to execute SamuraiAI workflows by sending an HTTP request from external services or scripts. Instead of manually operating the UI, you can trigger workflows automatically through integrations with other tools and automation systems.
Feature Overview
Section titled “Feature Overview”Key features of the Webhook functionality:
- Execute a workflow simply by sending a POST request to a dedicated URL
- Pass data in the request body (text, numbers, select options, file IDs, etc.)
- Choose between two response modes: “Respond immediately” or “Wait for completion”
- Rate limited to 60 requests per minute
How to Use
Section titled “How to Use”1. Switch the Trigger to Webhook
Section titled “1. Switch the Trigger to Webhook”Open the workflow editor, select the Start node, and open the properties panel on the right. Select “Webhook” from the “Trigger” dropdown.
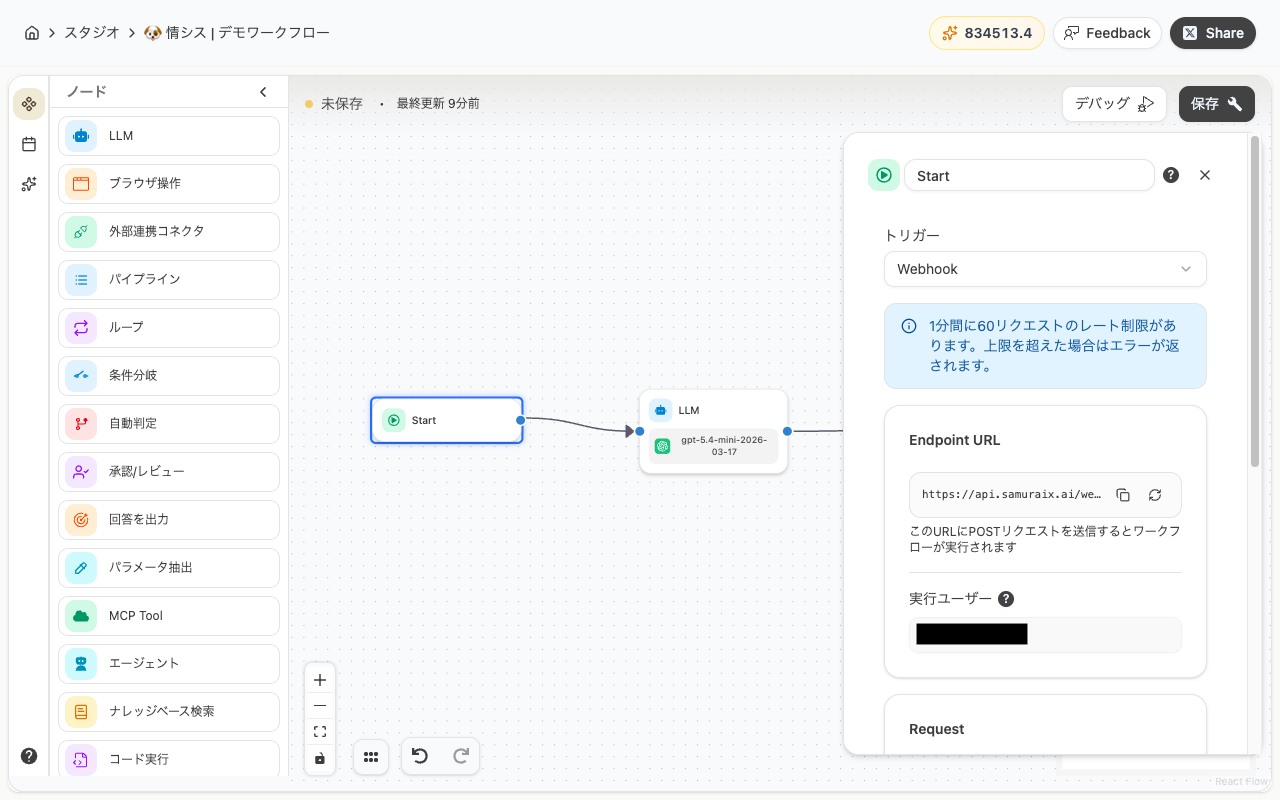
2. Check the Endpoint URL
Section titled “2. Check the Endpoint URL”When you switch the trigger to Webhook, a dedicated Endpoint URL is generated. Sending a POST request to this URL will execute the workflow.
You can copy the URL using the button next to it.
The Executor field shows the user whose permissions and credentials will be used to run the workflow.
3. Set Up Input Variables (Optional)
Section titled “3. Set Up Input Variables (Optional)”If you want to receive data from external sources, add input variables in the Request section by clicking ”+ Add Variable”.
Available variable types:
| Type | Description |
|---|---|
| Text | Accepts string values |
| Number | Accepts numeric values |
| Select | Accepts a value from predefined options |
| File | Accepts an ID of a previously uploaded file |
Once you add variables, a sample request body (JSON) will be displayed for reference when sending requests from external services.
4. Choose a Response Mode
Section titled “4. Choose a Response Mode”In the Response section, select a response mode.
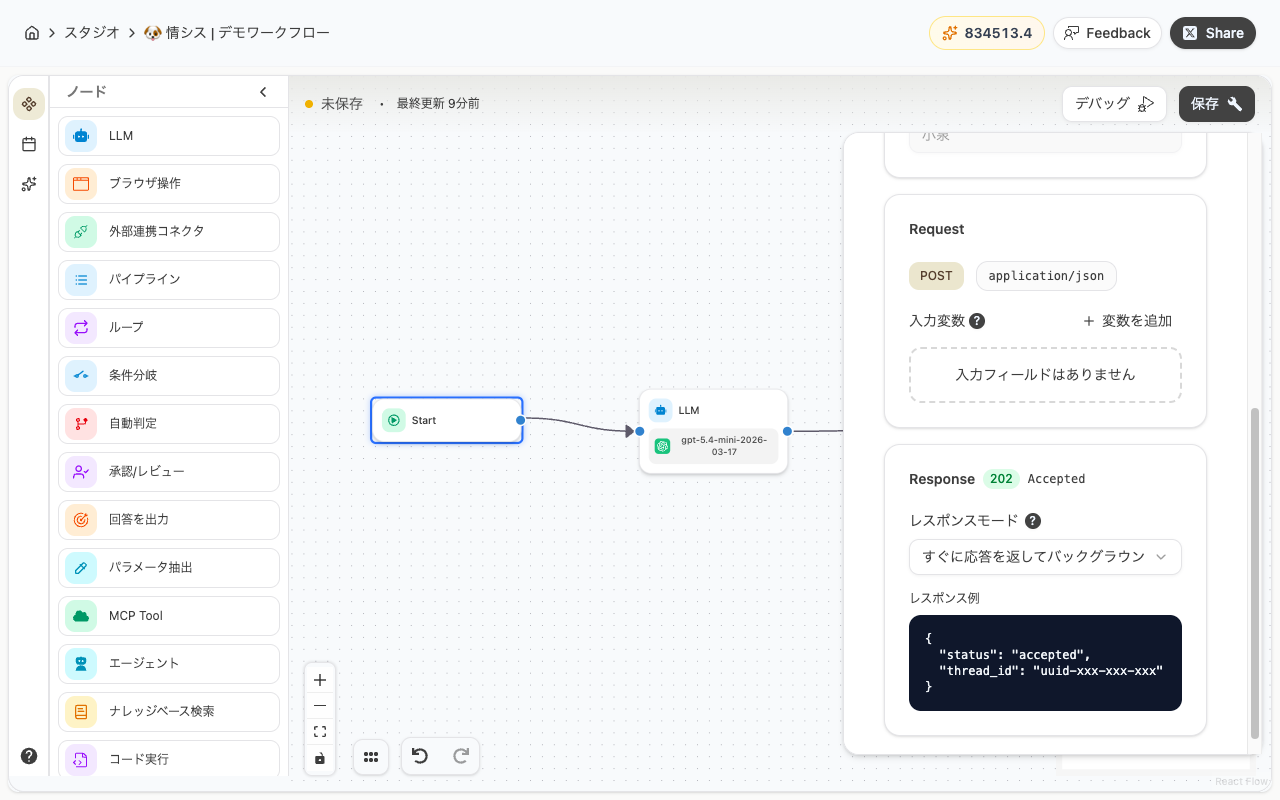
Respond immediately and execute in the background (default)
Returns an HTTP 202 response right away and executes the workflow in the background. Best when you don’t need to wait for the result before continuing.
Sample response:
{ "status": "accepted", "thread_id": "uuid-xxx-xxx-xxx"}Wait for workflow completion before responding
Waits until the workflow finishes and returns an HTTP 200 response with the result. Best when you need the output immediately.
In this mode, you can configure a timeout (1–300 seconds, default 60 seconds).
Sample response:
{ "status": "completed", "thread_id": "uuid-xxx-xxx-xxx", "output": { "workflow_output": "..." }}5. Save the Workflow
Section titled “5. Save the Workflow”Once the settings are configured, click “Save”. After saving, the Endpoint URL becomes active and can start receiving requests from external sources.
Common Use Cases
Section titled “Common Use Cases”| Use Case | Description |
|---|---|
| Form submissions | Automatically generate responses when a contact form is submitted |
| Google Apps Script | Trigger workflows from GAS when a spreadsheet is updated |
| Batch processing | Launch data processing workflows from an external scheduler |
| App integration | Execute workflows in response to events in your own application |
Now you can trigger SamuraiAI workflows from external services and scripts. Use this feature to integrate SamuraiAI with your existing business tools.
Last updated: