

App Access Permissions
App access permissions let you control who can view and run a workflow or chatbot, on a per-user or per-group basis. This is useful for apps that handle HR data, executive materials, or any content that should only reach specific members.
Open the Access Control Panel
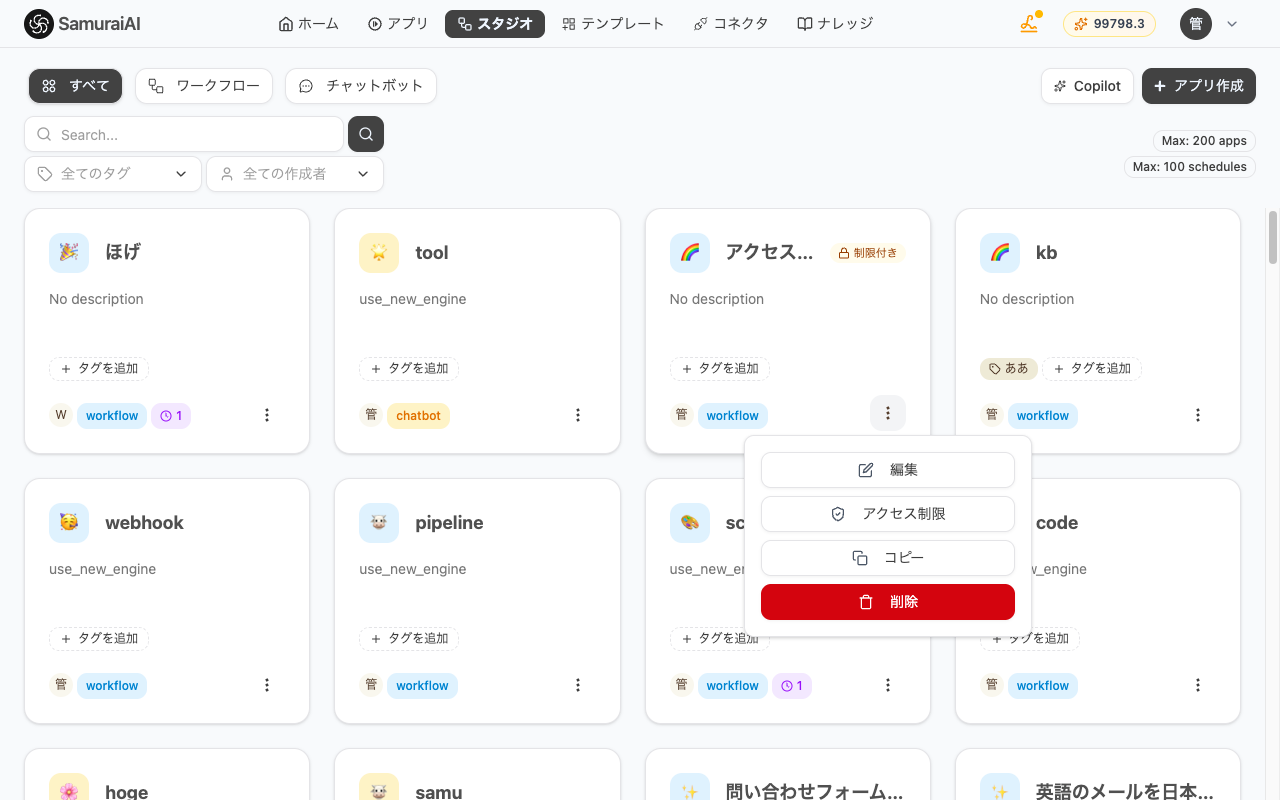
Section titled “Open the Access Control Panel”In the studio, click the three-dot menu on an app card and choose Access Control. Apps that already have an allow list show a Restricted badge on the card.
Grant Access
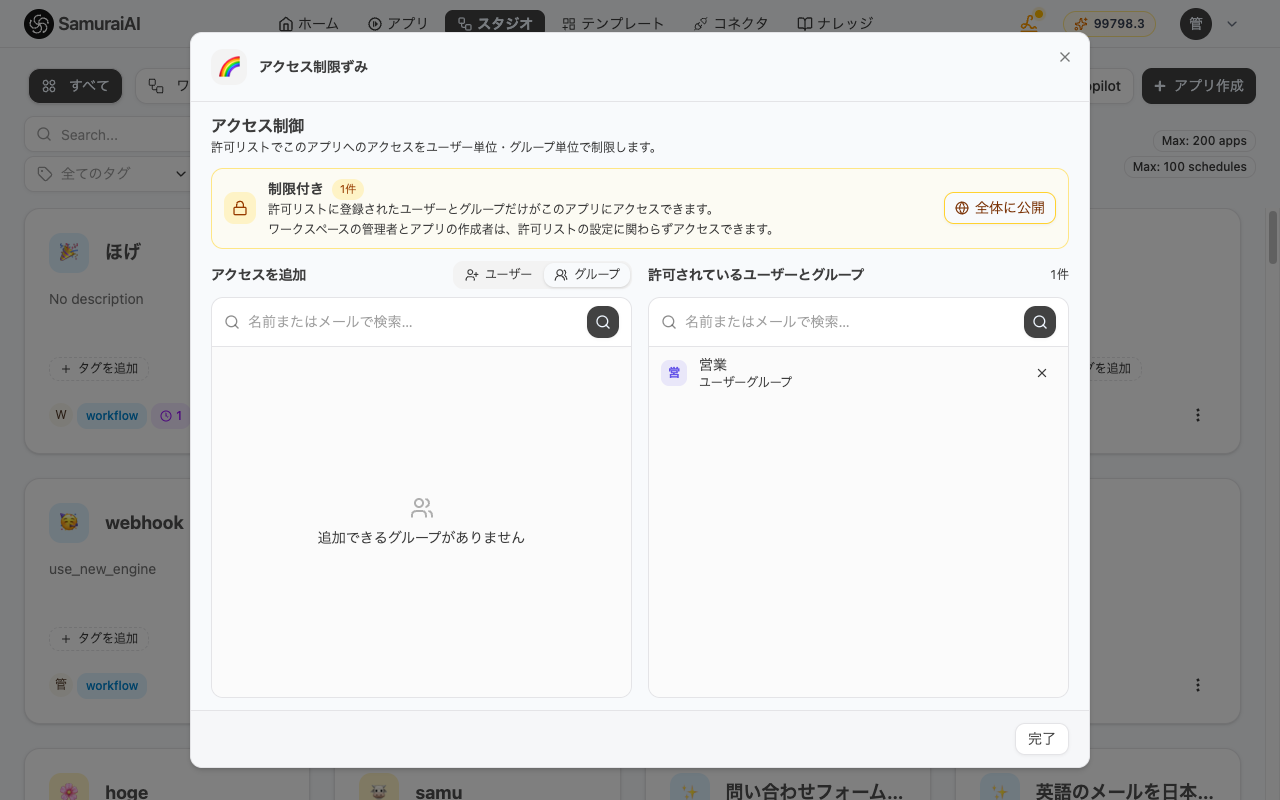
Section titled “Grant Access”In the Add Access panel on the left, pick a user or group and click Add. Use the segment at the top to switch between User and Group.
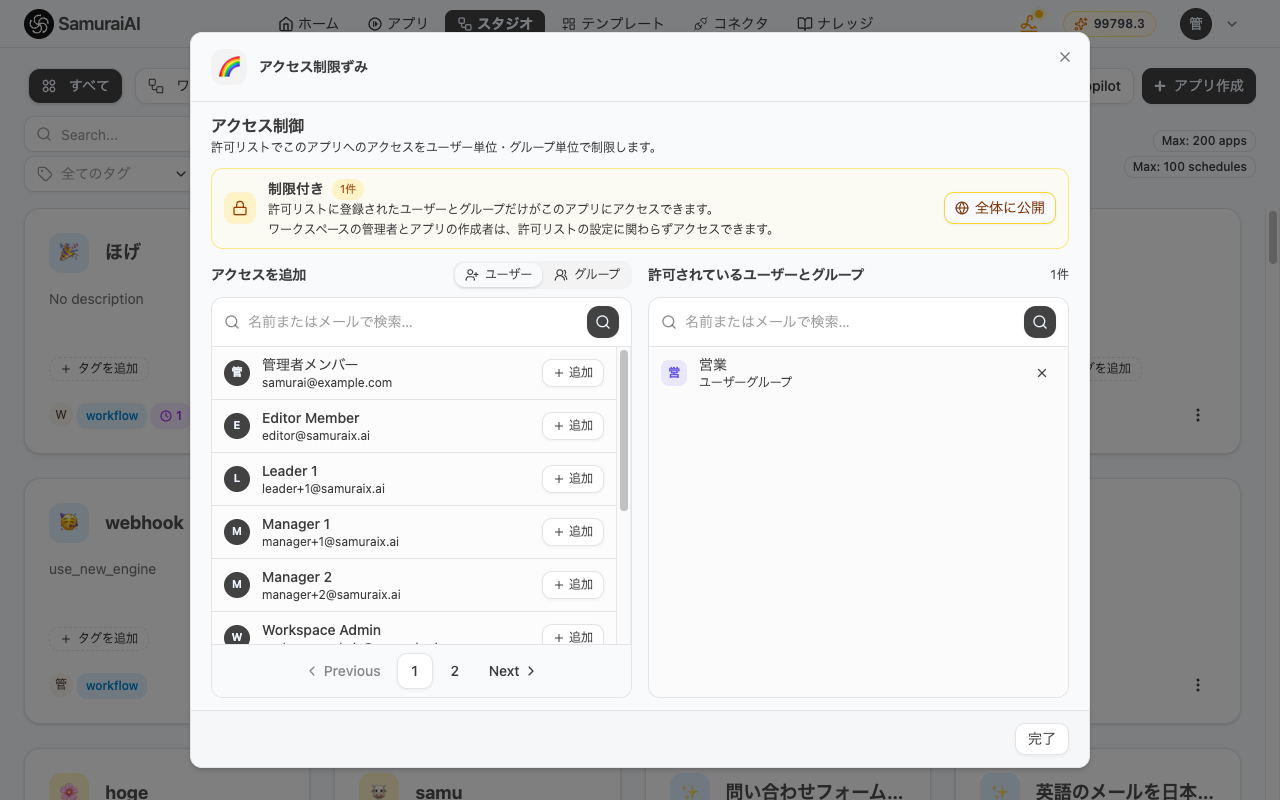
The Allowed users and groups panel on the right lists everyone with access. To revoke access, click the × on the row you want to remove.
You can also grant access to a whole group. Pick one of the groups you created in Groups, and every member of that group can use the app.
How Public vs. Restricted Works
Section titled “How Public vs. Restricted Works”When the allow list is empty, the app is Public to the workspace — every active member can view and run it. Add even one entry and the app switches to Restricted, so only the users and groups on the list can access it.
To make a restricted app public again, click Make Public in the banner at the top. After you confirm, the allow list is cleared and the app becomes available to everyone again.
Last updated: